Docker/jenkins/SonarQube
|
When you get the proposed install versions for the software you may encounter that the LATEST is greater than the one shown here, this is because software changes to add new features or bug fixes. It is recommended to use the LATEST and greatest |
Here you find the step by step process for creating a local environment using CICD practices.
Create Spring Boot App
Here the process is simple as we assume you know how to create a basic Spring Boot using the best starter link ever Start Spring IO.
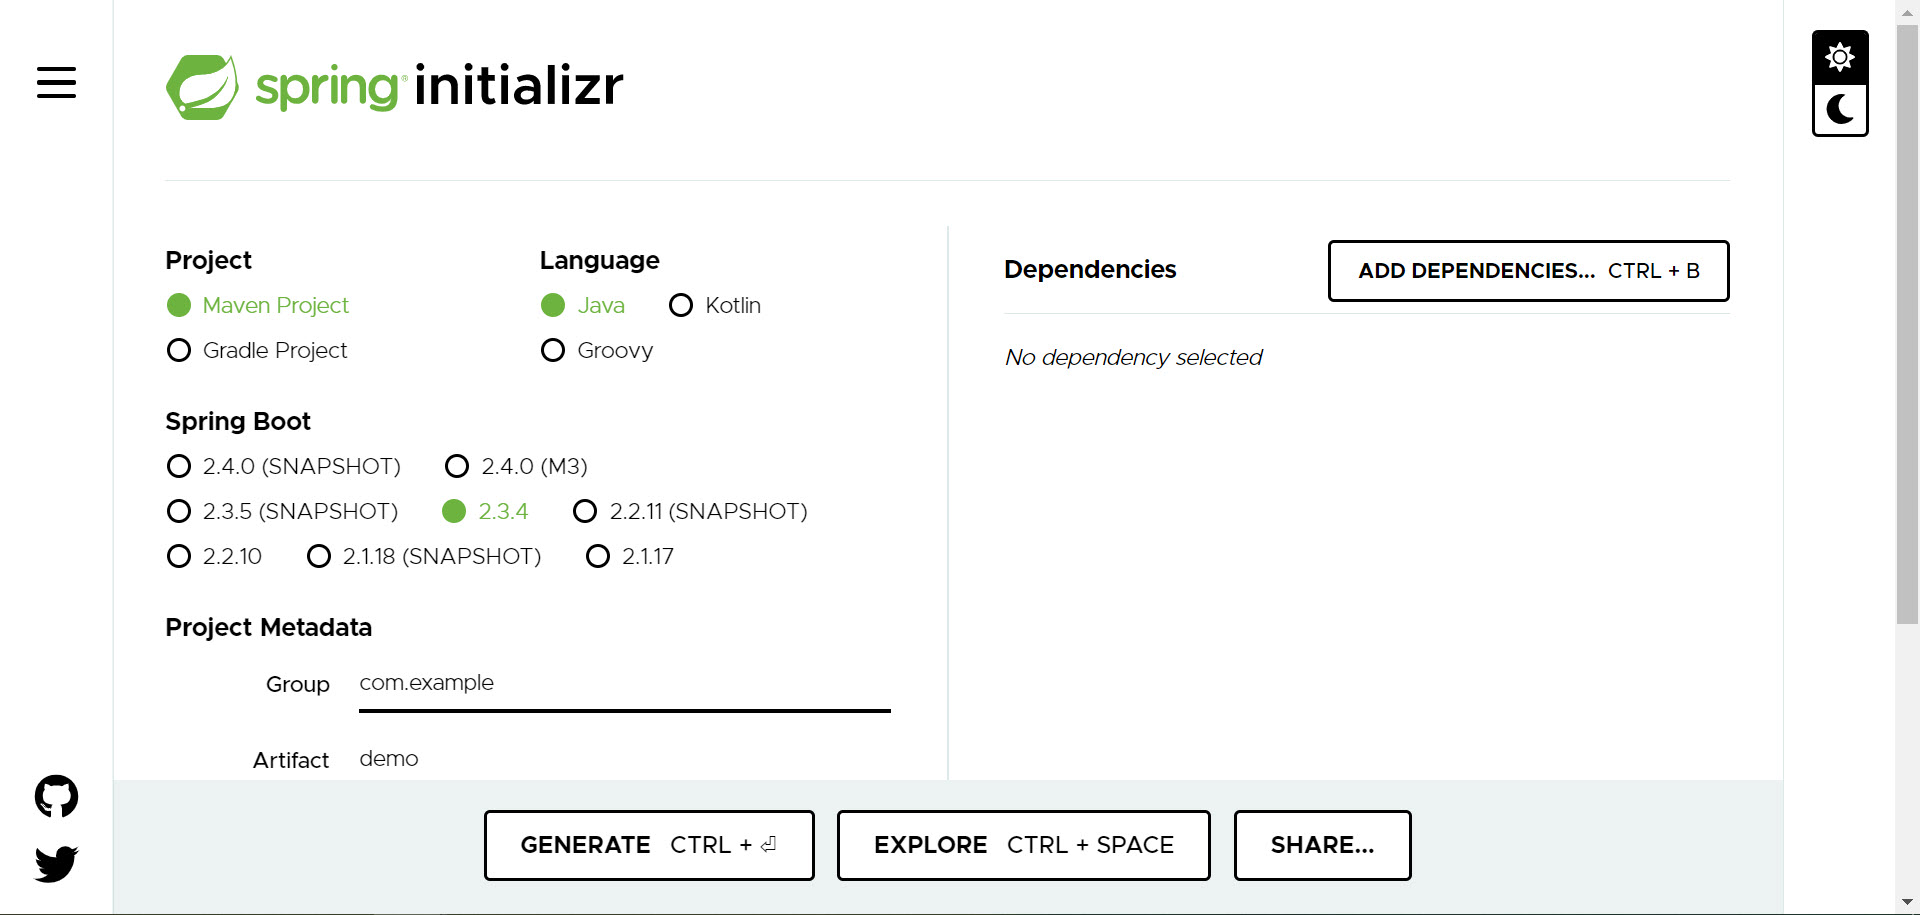
Generate the project and extract downloaded zip file. This way we have the initial project configuration.
|
Eventually this code would be pushed to a Git repository. Use your favorite IDE to edit files and continue with the tutorial. A copy of this code is in the Tutorial CICD Jenkins Sonar git repository. |
Configure Jenkins
Here we are going to document only the necessary steps required for our setup to properly work.
|
The assumption here is that you already configured Jenkins using the Docker image or the standalone WAR file (remember that Jenkins requires JDK 8). |
In this document we are going to use the Dockerized version of Jenkins. Please refer to the Docker INSERT LINK REFERENCE HERE section for details. We need to know what it is installed in the Docker image, to do so, type the following command to access the command line interface for such image.
$ docker ps (1)
$ docker exec -it <container_name>|<container_id> /bin/bash (2)| 1 | To gather the container_name or container_id for the _Docker image. |
| 2 | To access the container command line interface. |
As we built our sample application using Java 8, Spring Boot and Maven, we need to guarantee them inthe Docker image.
$ java -version (1)
$ git --version (2)
$ mvn --version (3)| 1 | Java verification. If it works we know it has JDK installed (and it must as it is a requirement for Jenkins). We need JDK 8 and in fact it uses OpenJDK 1.8.0_181, which it is already installed in Docker image. |
| 2 | Git verification. If it works then we can use it for the sake of pulling source code in the Jenkins pipeline, otherwise it needs to be installed NOTE: It is present in the Docker image. |
| 3 | Maven verification. If it works then we can use it for the sake of building our source code, otherwise it needs to be installed. NOTE: This is not present in Docker image, so we need to install it. |
As the last verification fails for Maven we must proceed to guarantee it is present in the Docker image. To do so, there are two ways, one is to let Jenkins set it up, or in the Docker image command line interface install it by hand. In this guide we will follow the Jenkins, which we describe next.
Build Pipeline
In order to run the Jenkins pipeline for this guide, there are some other plugins to be installed. Select the Manage Jenkins Plugins as shown below.
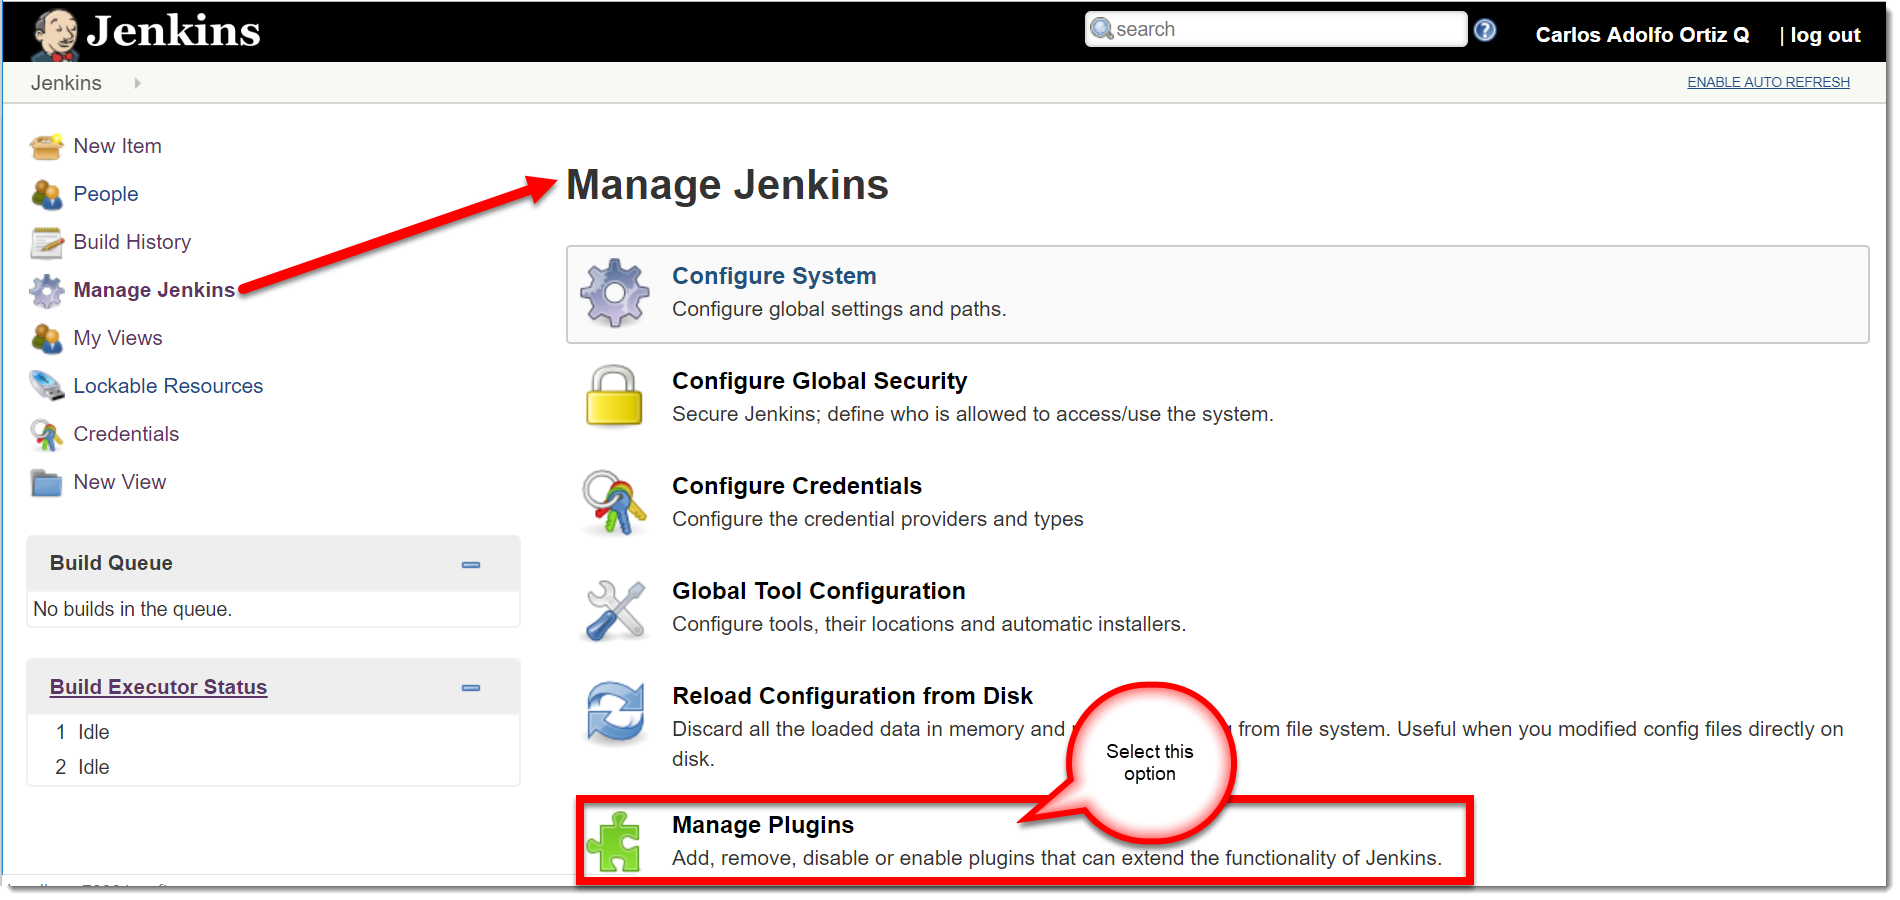
Next select the Available plugins and use the filter (search) option to search for these plugins.
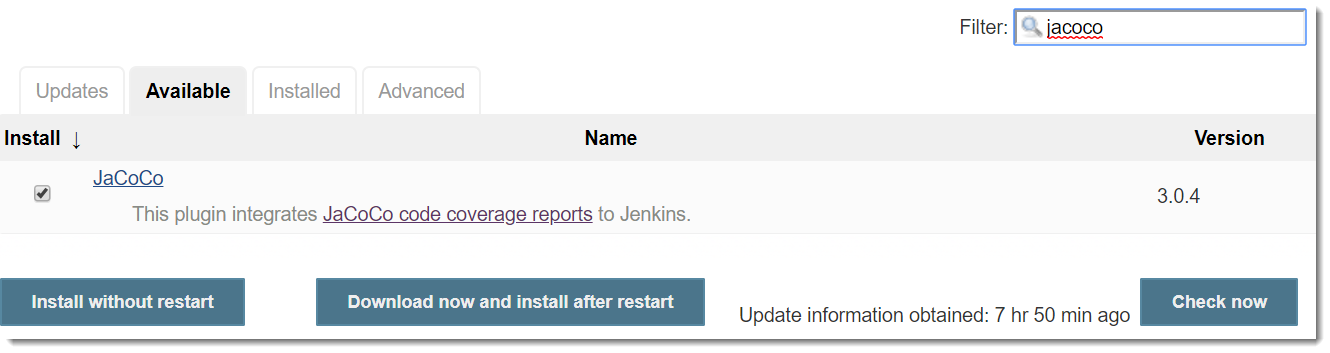
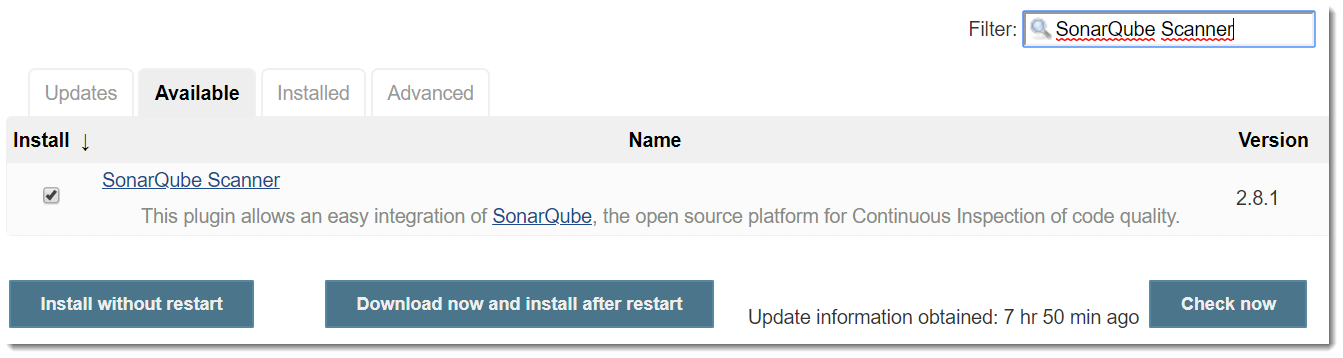
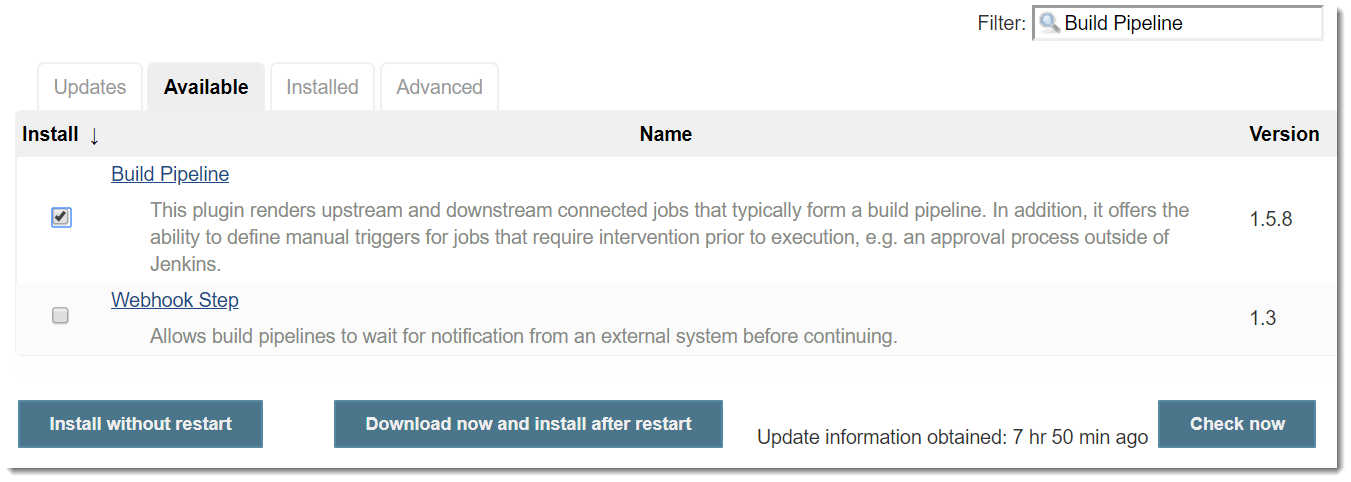
| Use the latest version for plugin at the moment besides the names may also differ. |
Once they are selected, use the Install without restart button.
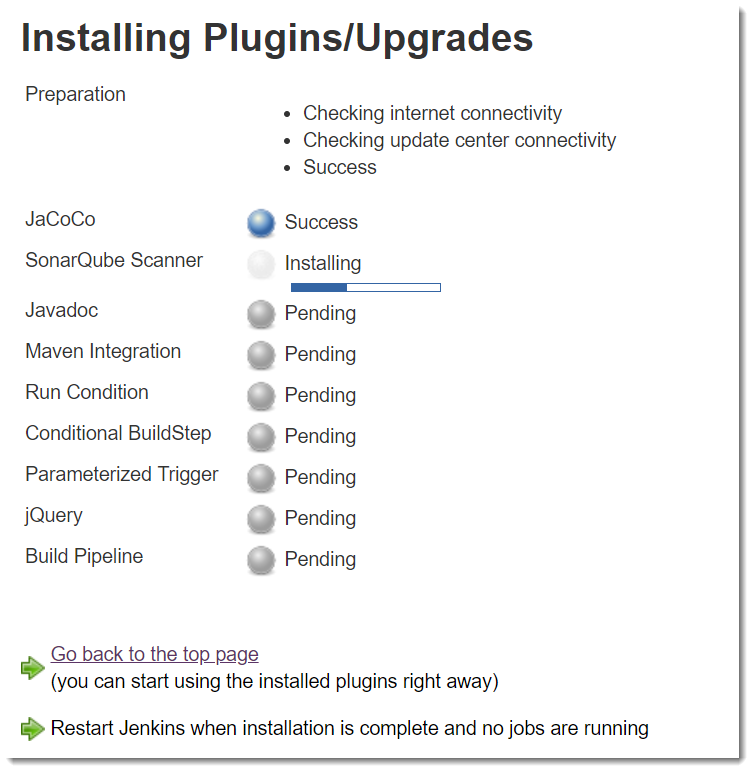
| It is necessary to restart in order to use these plugins, do it now. |
Configure Maven in Jenkins
Open your Jenkins home page.

Introduce your valid credentials and you will be presented with the main page.
Locate the option Manage Jenkins and next the option Global Tool Configuration.
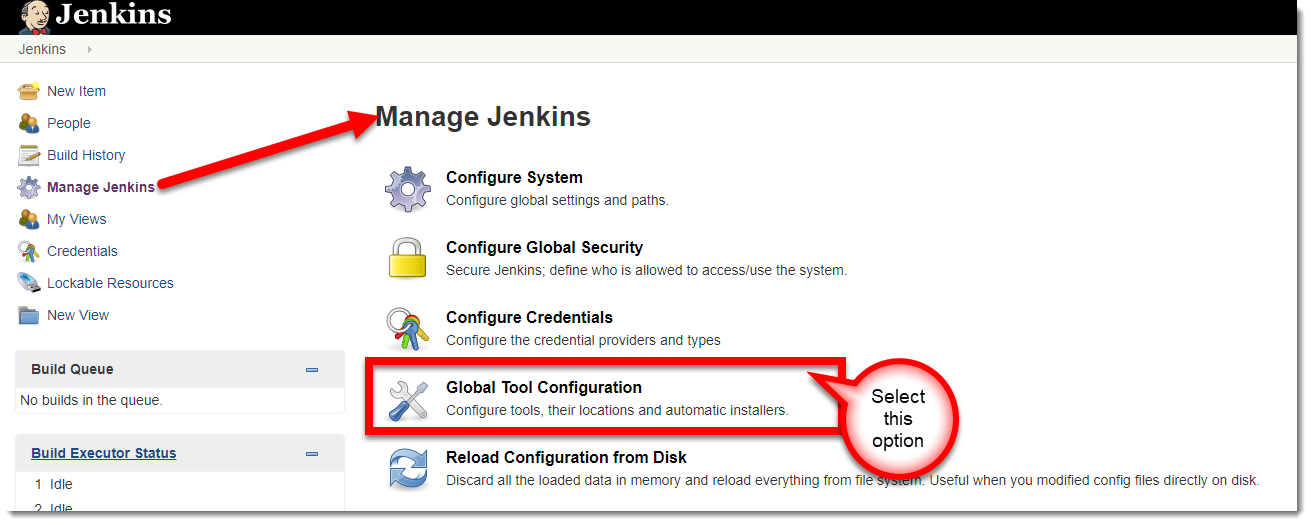
Next locate the Maven section.
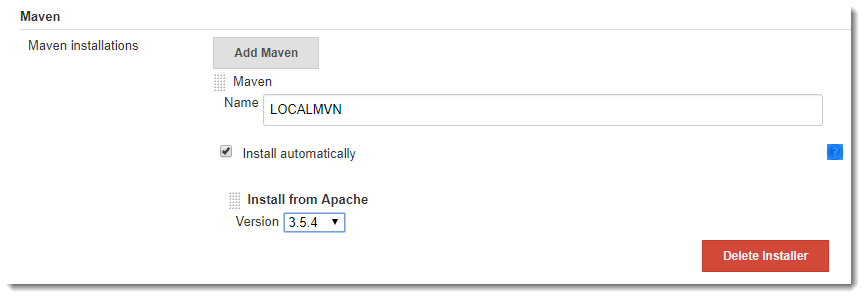
To achieve what is shown in the picture above you must click the Add Maven button and set as the image depicts.
| Select the version that is more convenient according to your project. |
Next click the Save to finish and this way you have maven setup.
Configure SonarQube Scanner
After all required plugins are installed in the previous section, we need to install the SonarQube Scanner.
Open your Jenkins home page.
Introduce your valid credentials and you will be presented with the main page.
Locate the option Manage Jenkins and next the option Global Tool Configuration.
Next locate the SonarQube Scanner section.
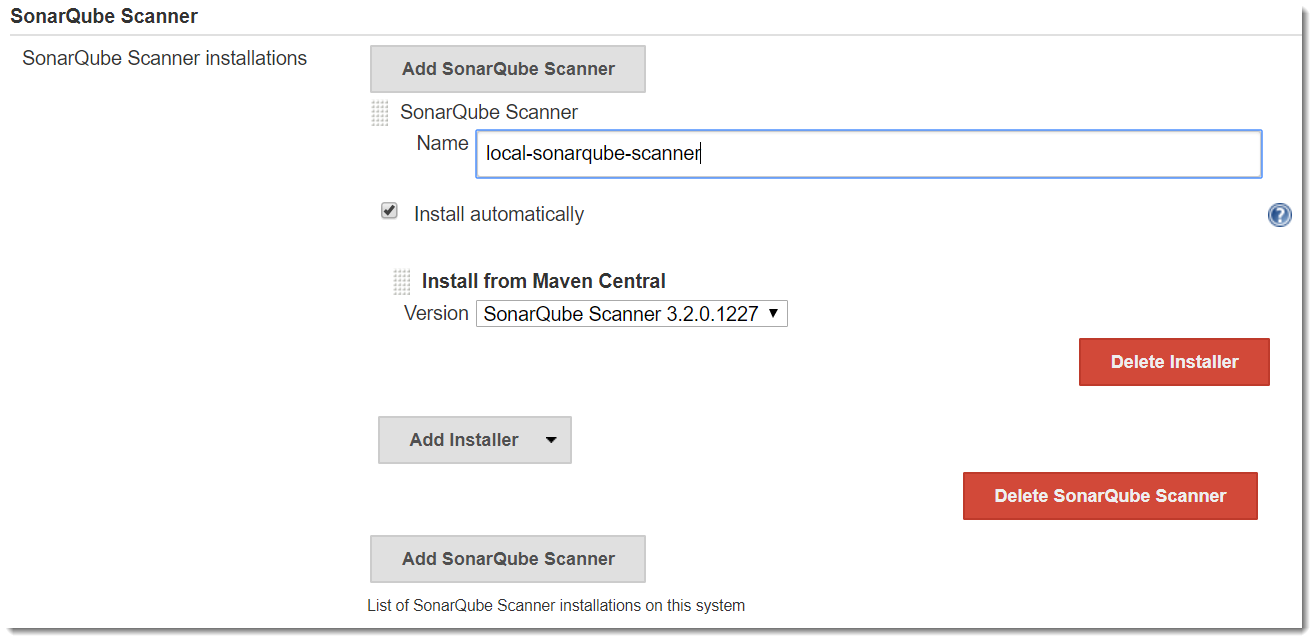
To achieve what is shown in the picture above you must click the Add SonarQube Scanner button and set as the image depicts.
| Select the version that is more convenient according to your project. |
Next click the Save to finish and this way you have maven setup.
Build a Pipeline
A pipeline in Jenkins is the recipe of tasks it needs to execute, sequentially or in parallel. In this section we are going to define our sample pipeline for demostration purposes.
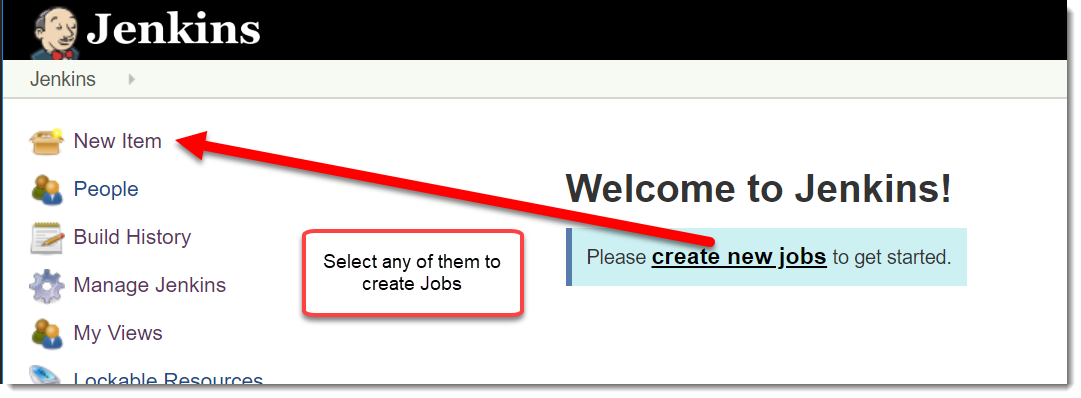
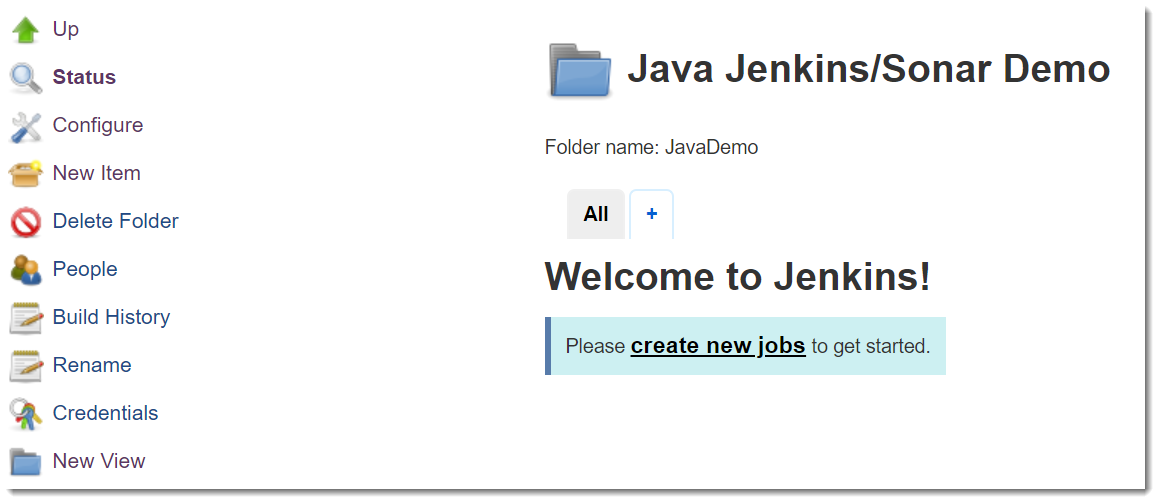
Login to Jenkins and click the Create new Jobs or New Item.
The next step is to declare the type of project we are going to build. Here we create a folder style as a container for steps in the pipeline.
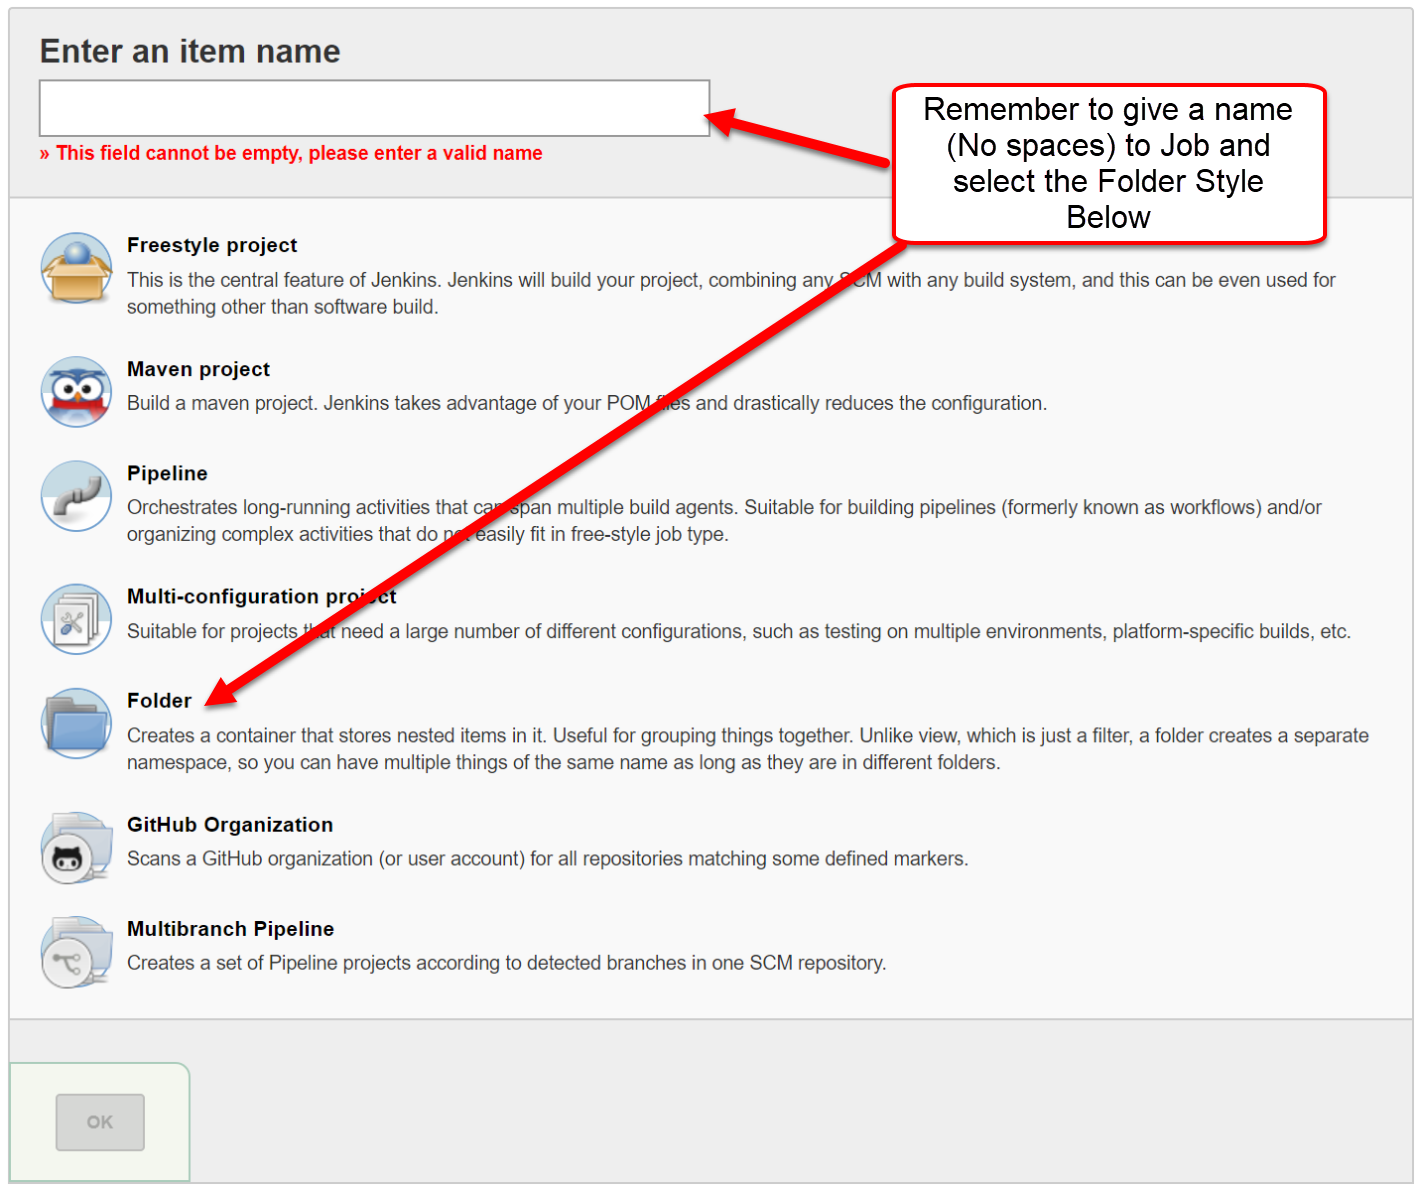
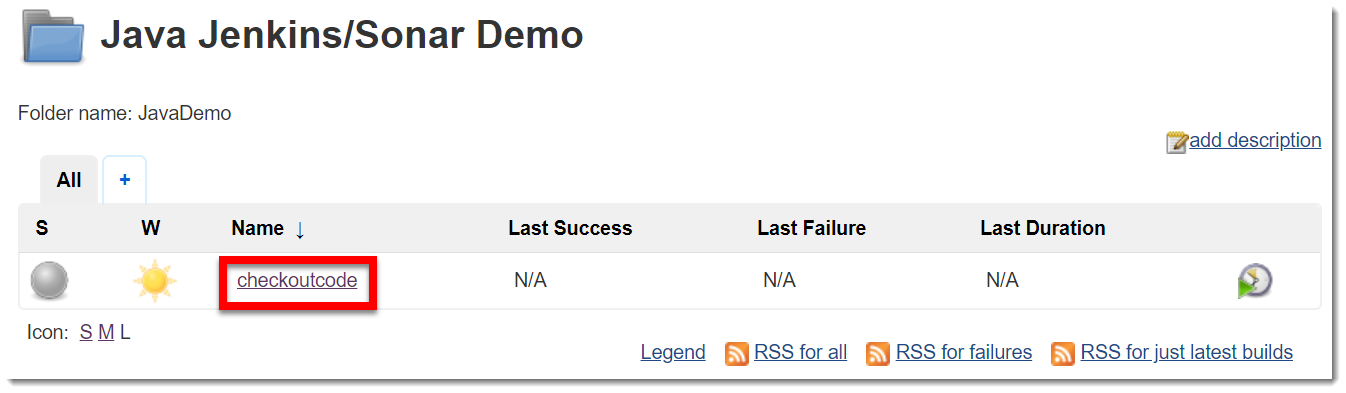
In the name of the project write JavaDemo. When you go back to main page, you will be presented with the following screen.

|
Notice the Sun in the second column, this will show you the status of the project, when in the Sun icon, it means that the project is healthy, and it is based in the last five executions of the job. |
The next step is to configure the steps for the pipeline. Click in th Java Jenkins/Sonar Demo and it will show the following screen.
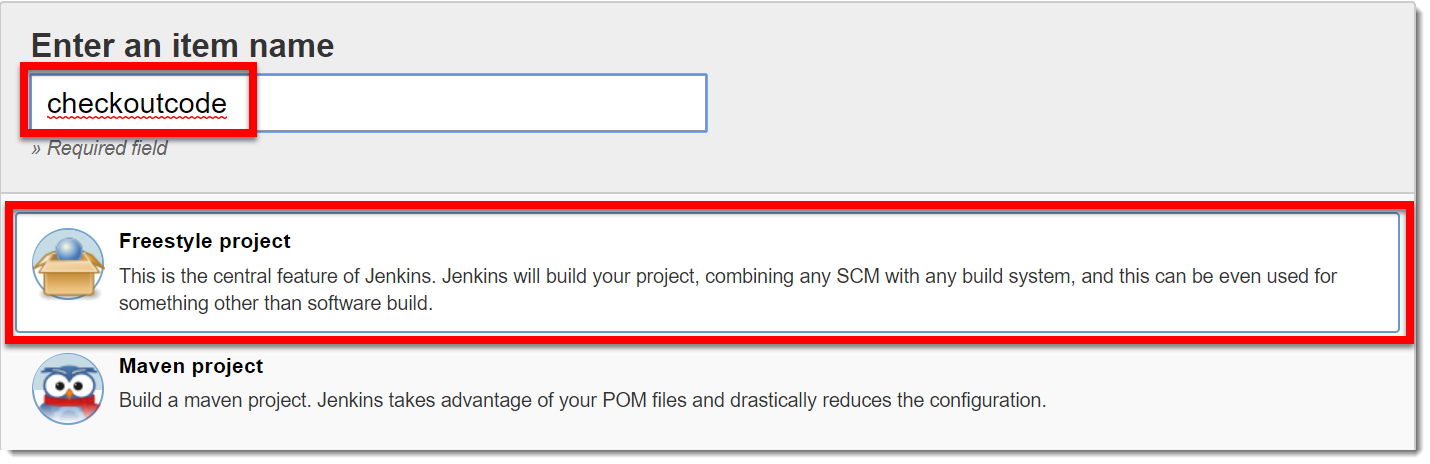
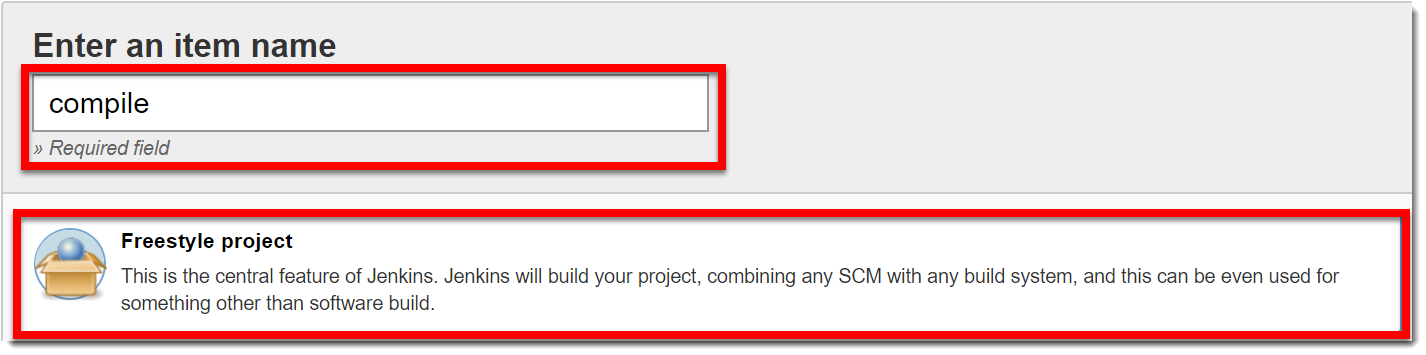
Next you must create a new item to be associated in the container. For this purpose locate the New Item in the menu. And in the choices for new items select the Freestyle project, and select Ok.
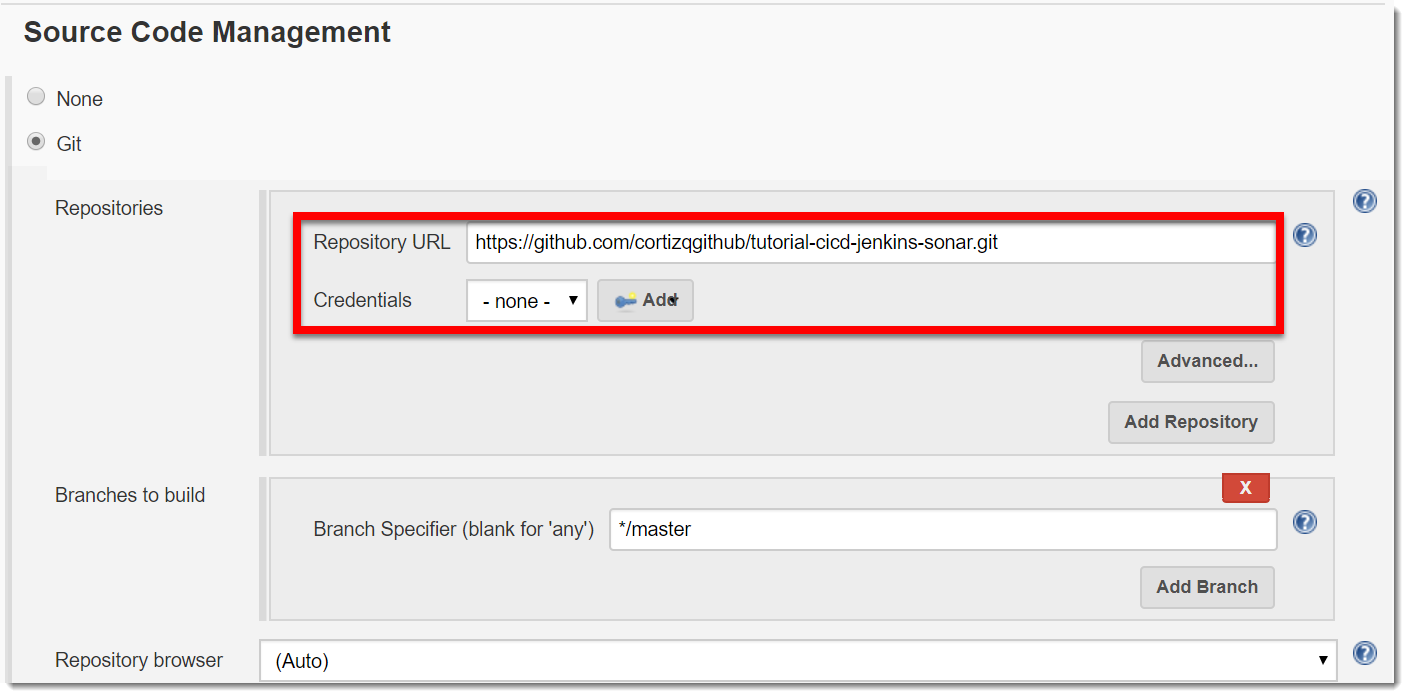
Next it is time to configure how to access the source code, which will be made by Git. First define what is the URL where the code will be pulled from.
Click in the Source Code Managemente tab link.
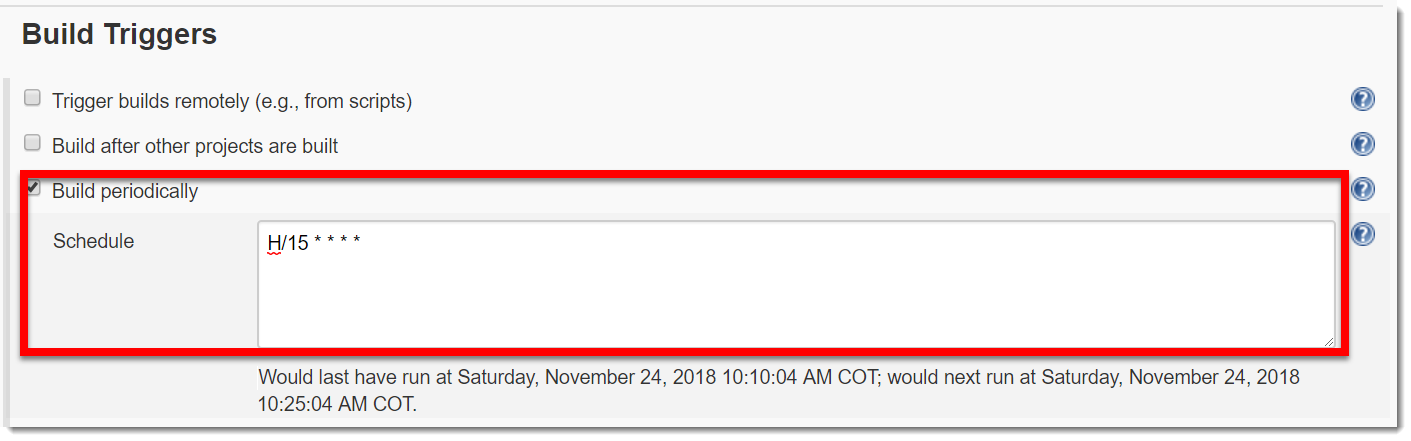
Next click in the *Build Triggers*, this will schedule execution every 15 minutes.
At this point click in Apply and then Save buttons which lead you to here.
Next click in the + button to define more steps. Here we are going to add the Pipeline View.
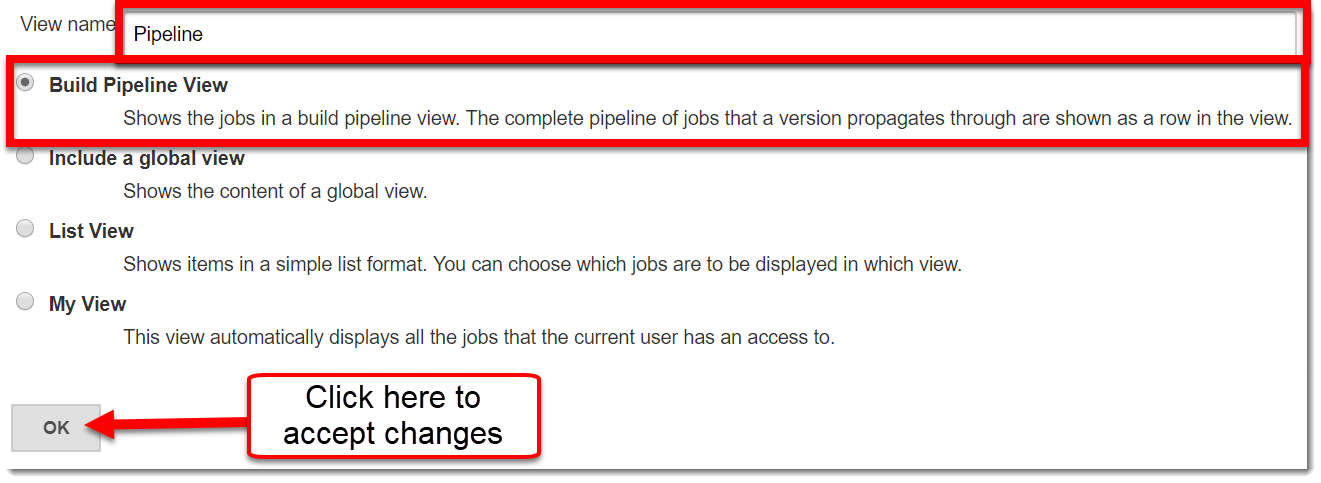
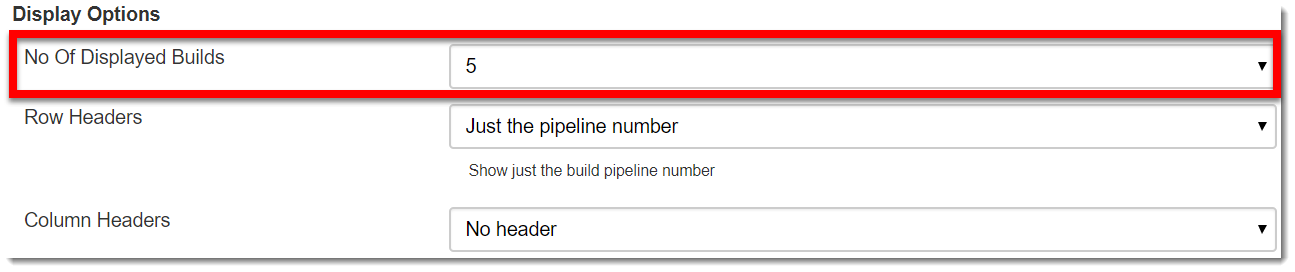
And in the settings form put the following values (only one shown).
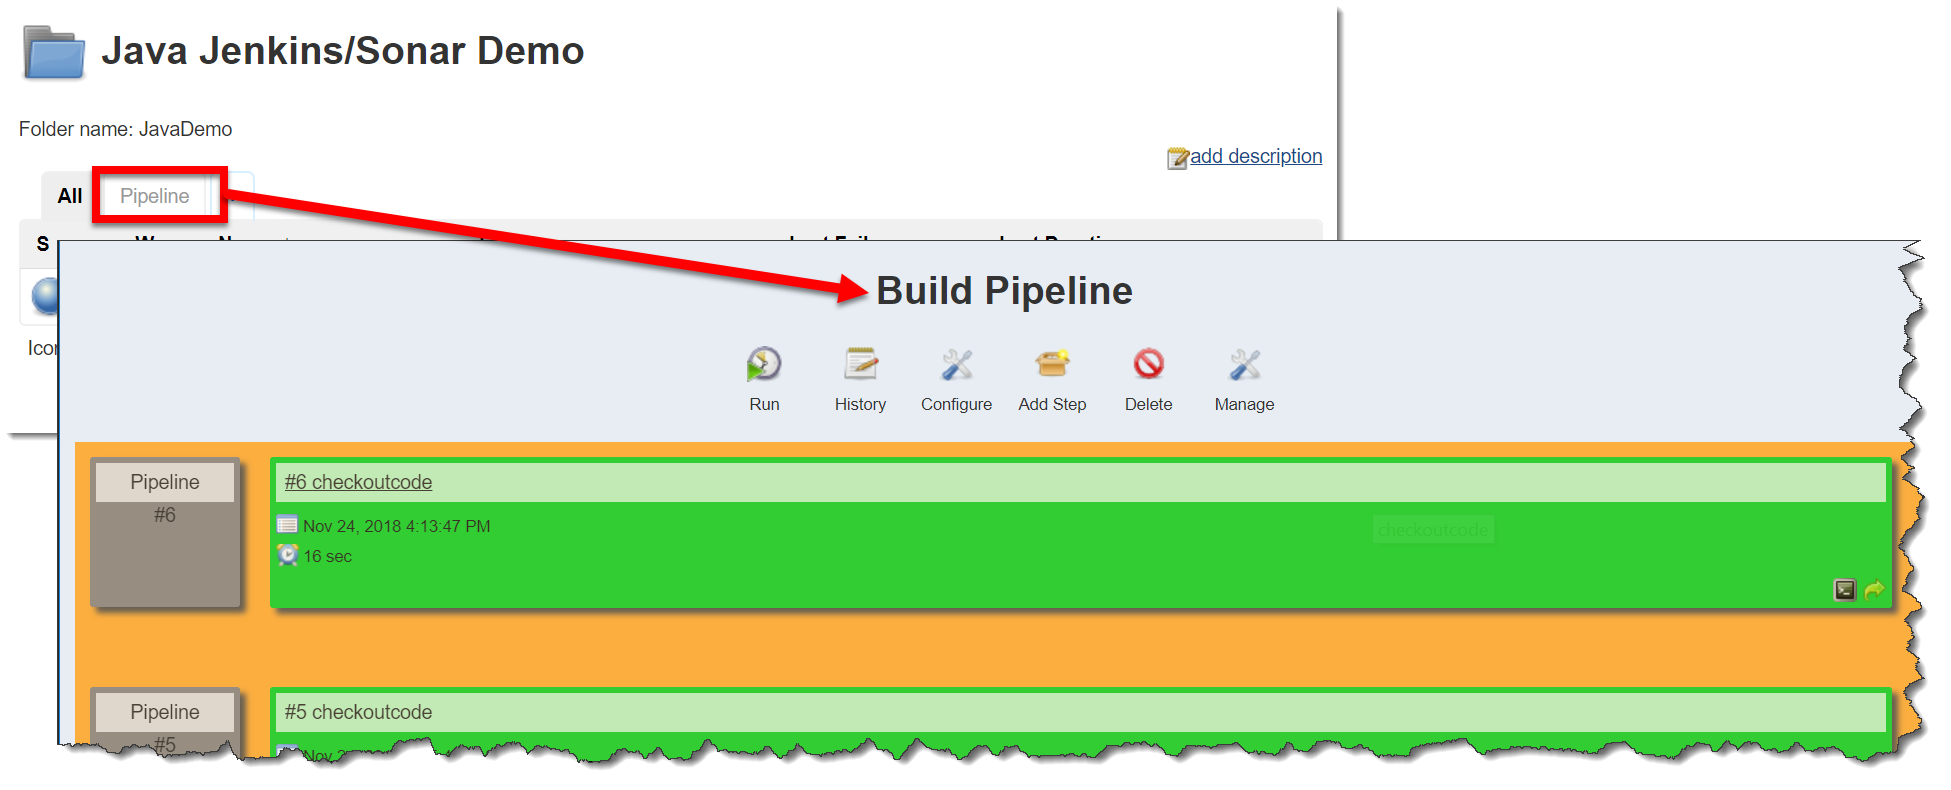
This way in the project home a new tab appears to show the Pipeline, as shown next.
Next we create the next step in the pipeline. Select the New Item when you are in this following screen.
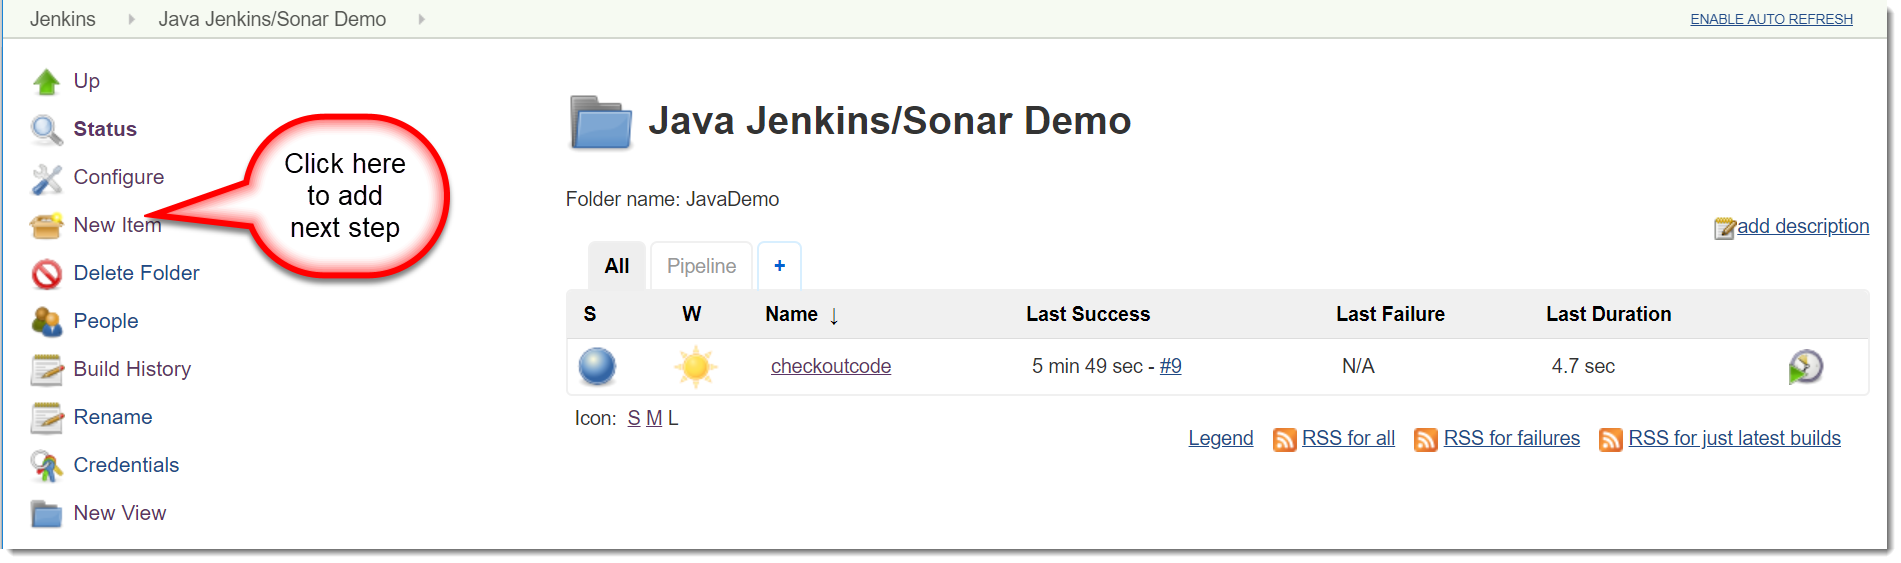
Next we define the type of project.
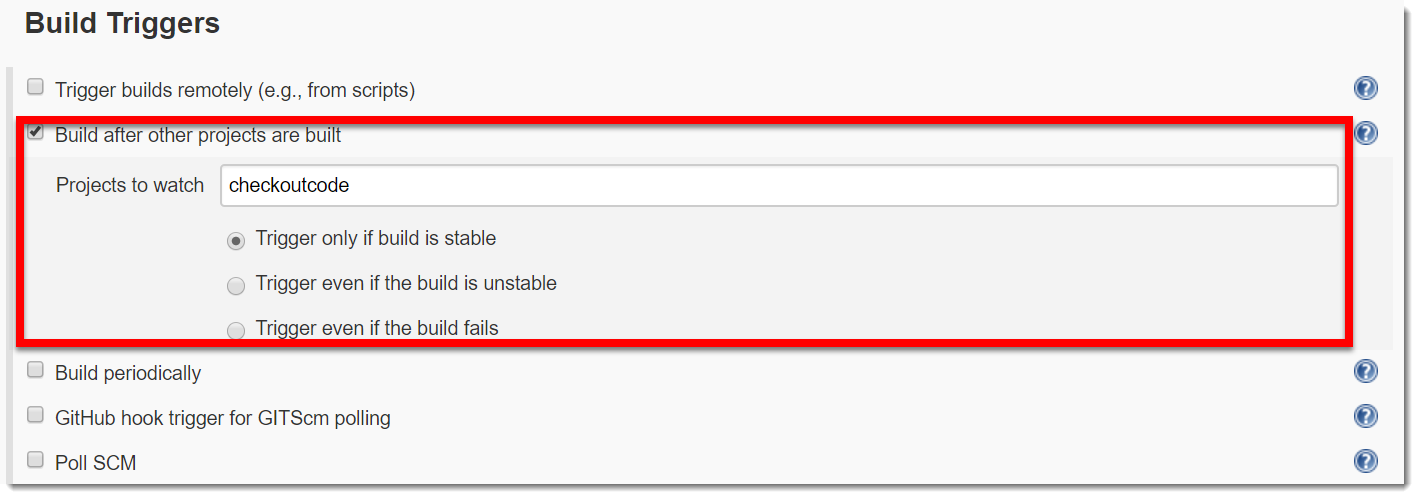
Click Ok to define the settings for task and then click on tab Build Triggers and configure as shown next.
Next click the tab Build, click in the Add build step which will present a list of choices and the one to select is Invoke top-level Maven targets which will lead to the following settings.
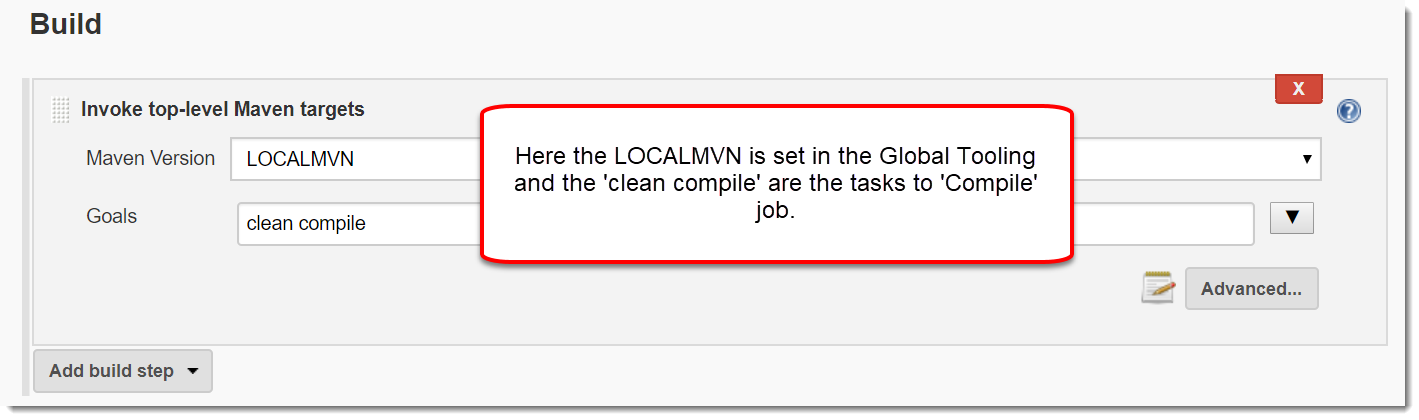
And select the Advanced button and in the POM field set the path for the source code which is located under the Jenkins installation Project Workspace.
And this conclude this job. Based in these instructions you can create the next job which is to run the Java App Tests. Here name task as test and in the similar way for job package.