Jenkins
According to the Jenkins site.
Build great things at any scale
The leading open source automation server, Jenkins provides hundreds of plugins to support building, deploying and automating any project.
Setup
The first thing to do is to download the software to be installed. It is recommended that you grab the Generic Java package (.war) file in the Long-term Support (LTS) section.
Once you have downloaded the Generic Java package (.war) open a shell window to execute.
$ cd /path/to/war/file
$ java -jar Jenkins.war --httpPort=7000 (1)| 1 | Use this War file if not using a Docker image. |
The first time it will run a setup process it will show application log in the terminal to see.
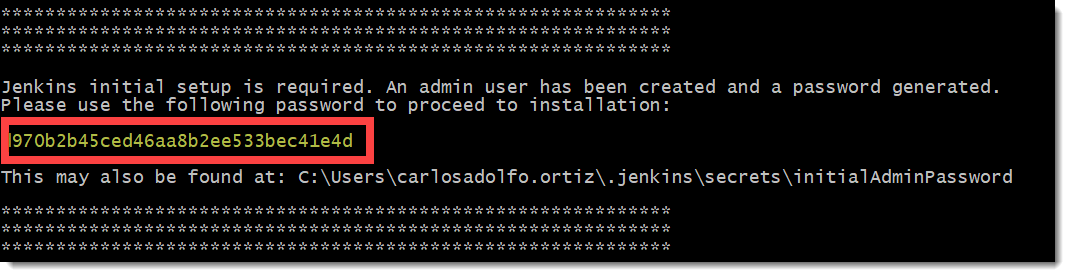
|
This magic number shown in screen varies in your installation, notice as well that a file with that number was created in path shown in picture. Folder path is in Windows format, adjust to your Operating System accordingly. |
Now you can go to http://localhost:7000 to continue with the configuration. The first time you access the site it will ask you for the secret number generated in the last step.
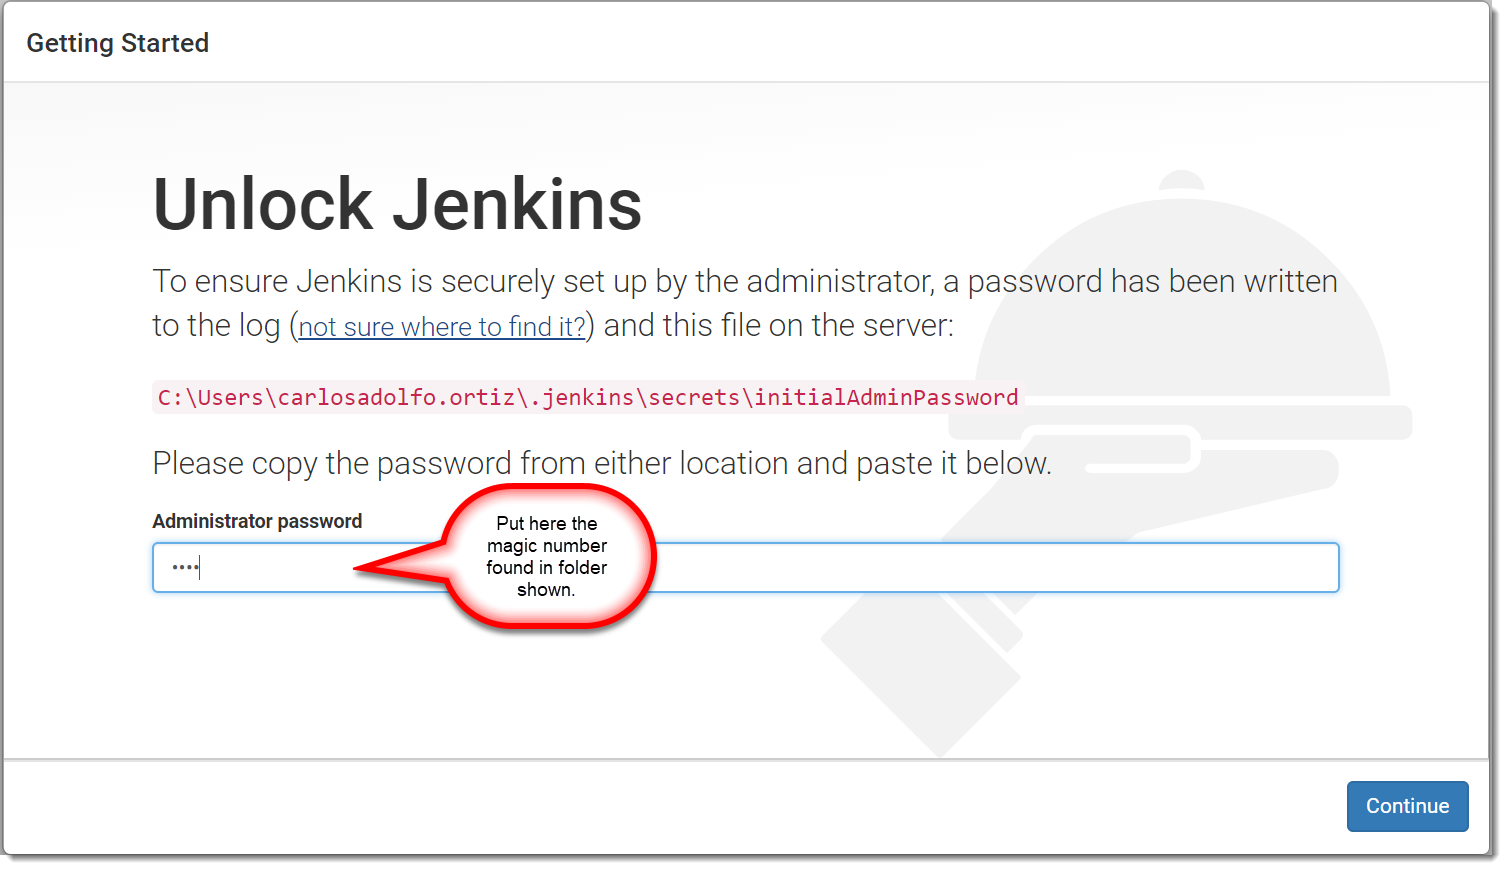
After giving the initial admin password to unlock the installation, you are now ready to Customize Jenkins.
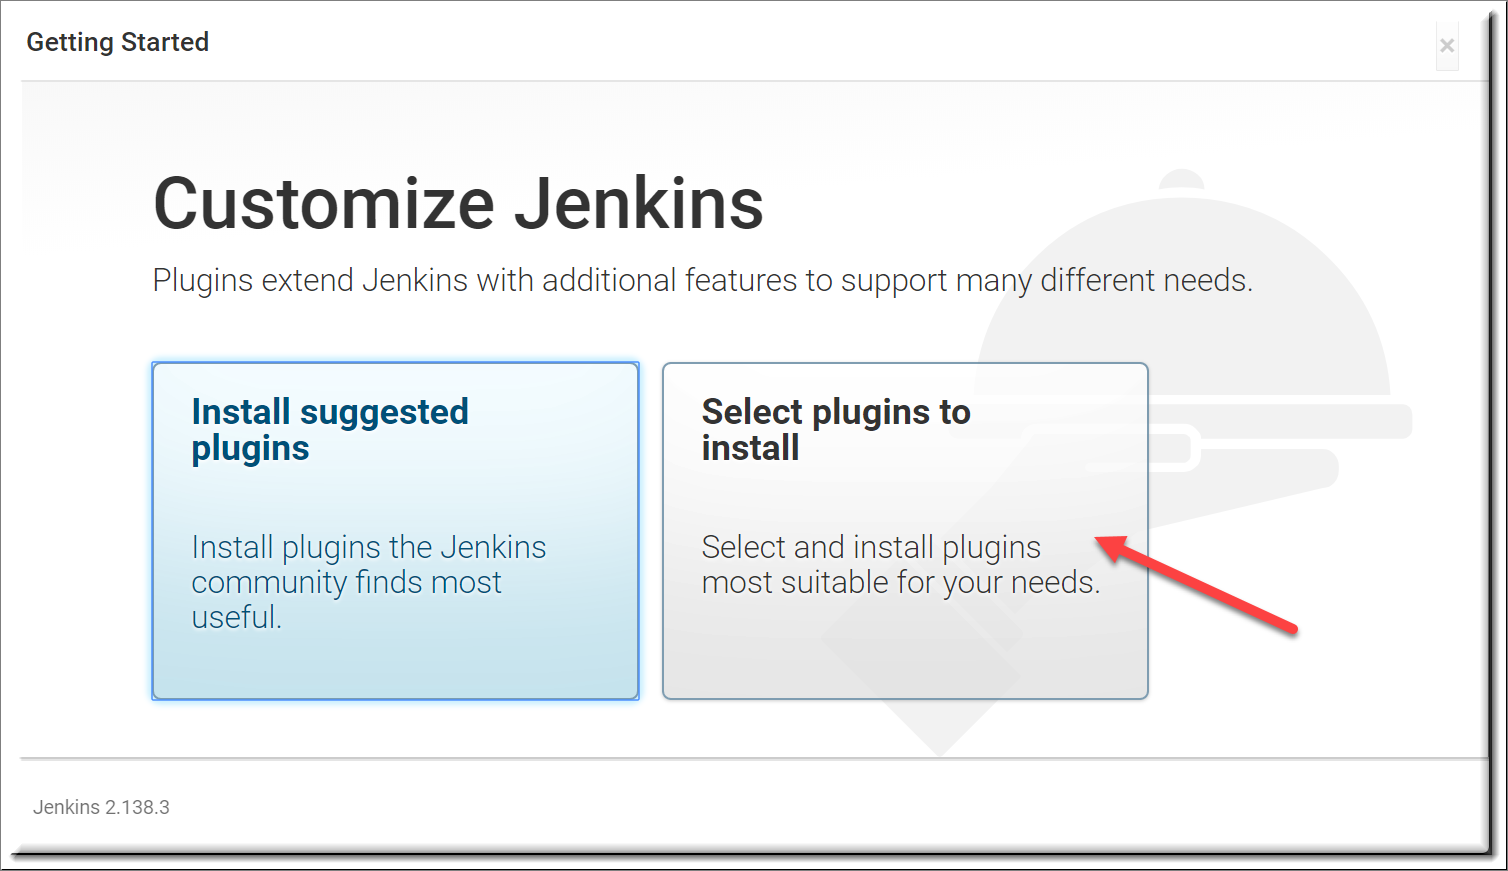
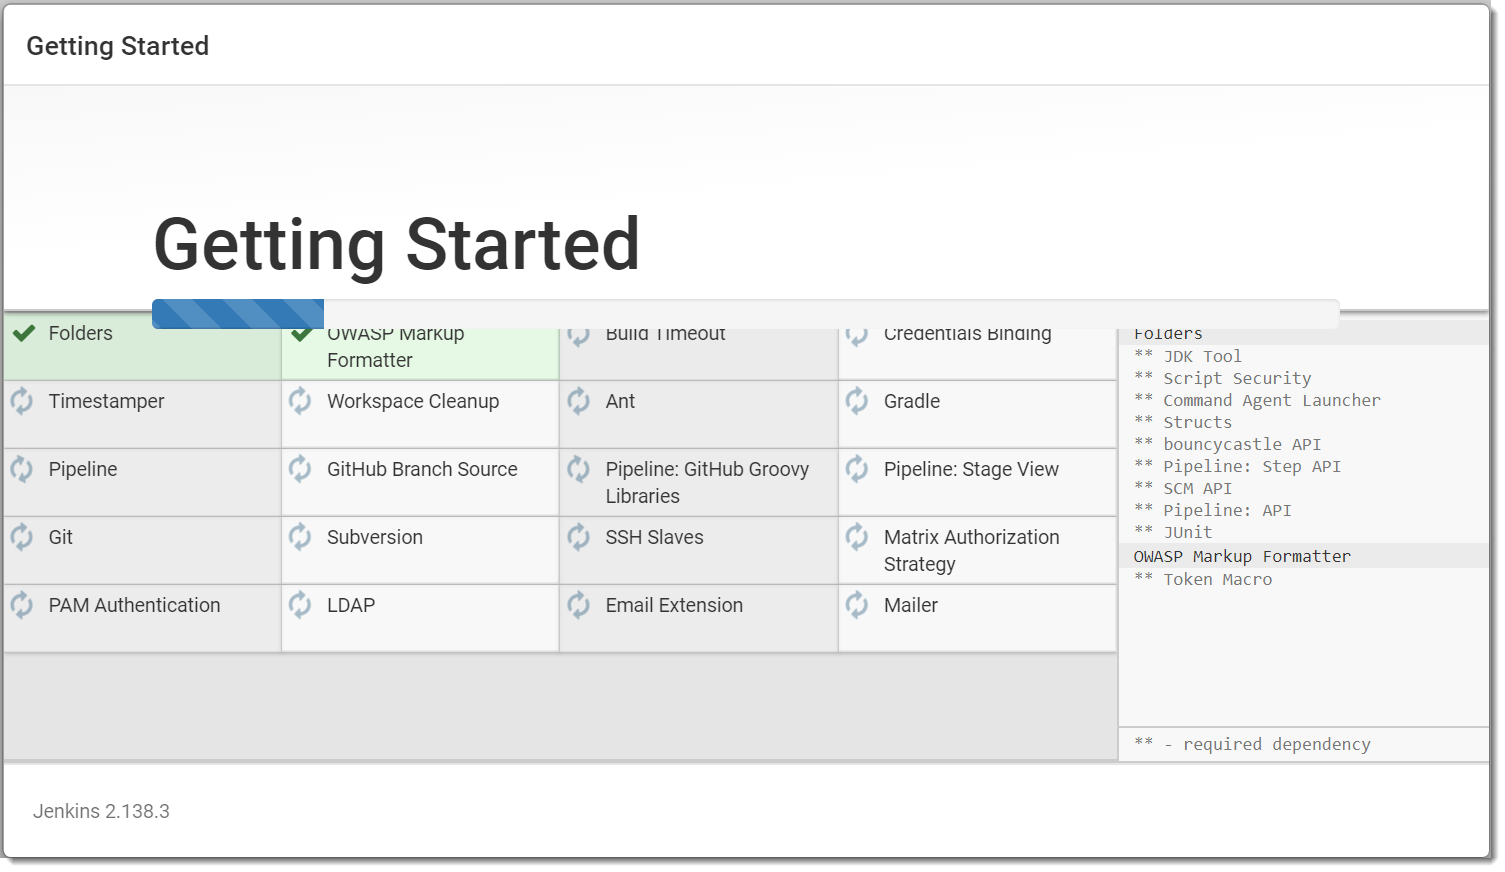
Here it is recommended to install the suggested plugins.
|
All shown suggested Plugins must be successfully installed. Reject if they are not compatible with the Jenkins installation you are trying to configure. |
Now it is time to register the super important rood admin user. Keep in mind that if you lose these credentials then the system may be void, unless you have more admin users set.
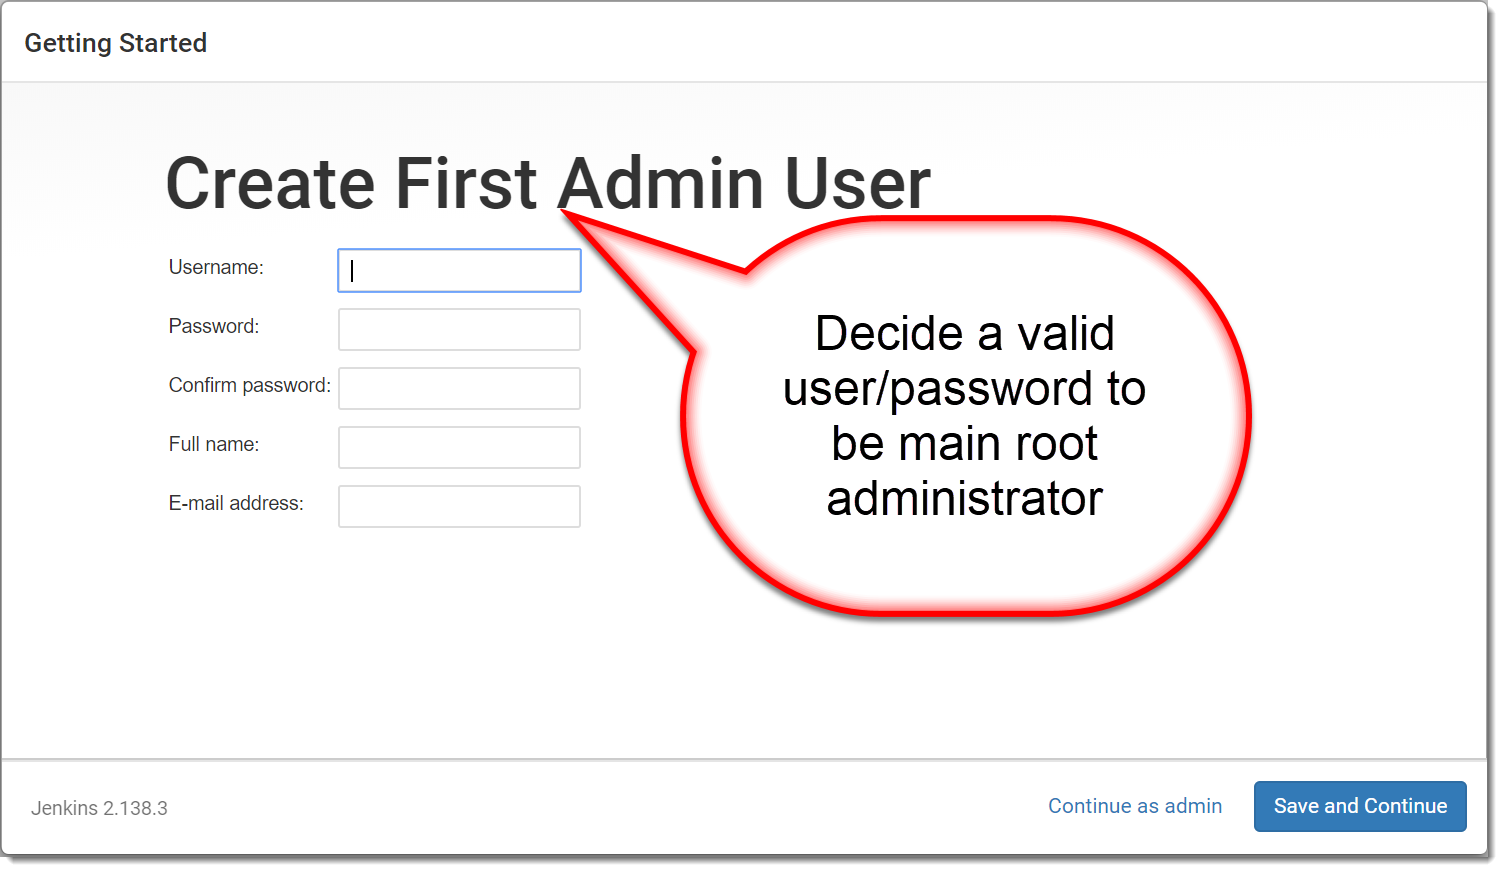
|
Keep these credentials in a secure place. |
When all data is filled, click in the Save and Continue button.
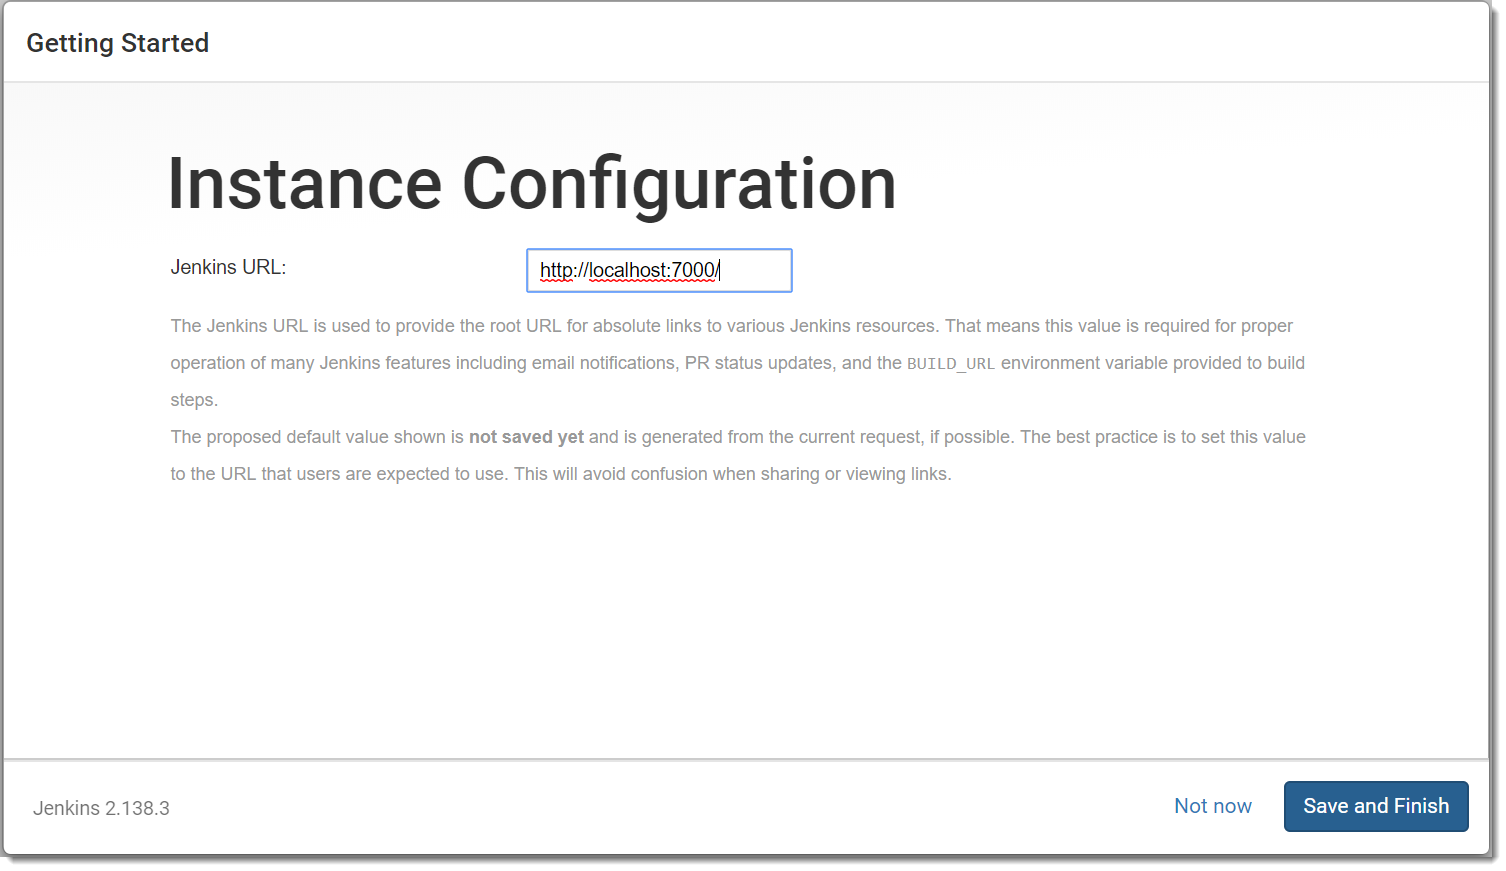
This is the last step as the button Save and Finish button hints.
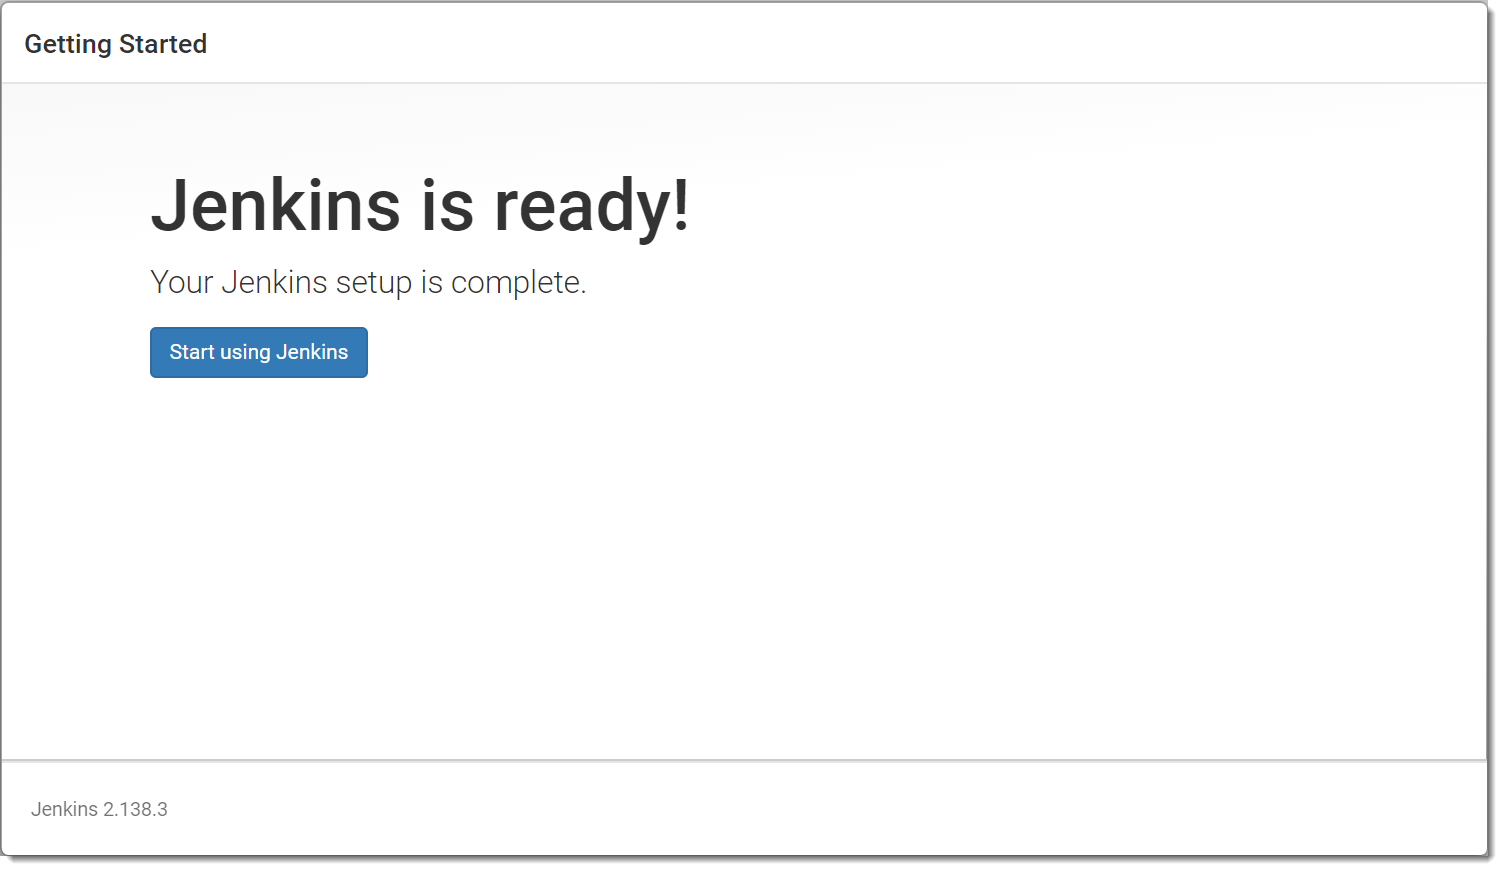
This concludes Jenkins Configuration.
References
Getting started with the Guided Tour https://jenkins.io/doc/pipeline/tour/getting-started/
Introducing Tutorials in the Jenkins User Documentation https://jenkins.io/blog/2017/11/27/tutorials-in-the-jenkins-user-documentation/
Introducing Jenkins X: a CI/CD solution for modern cloud applications on Kubernetes https://jenkins.io/blog/2018/03/19/introducing-jenkins-x/