SonarQube
Setup
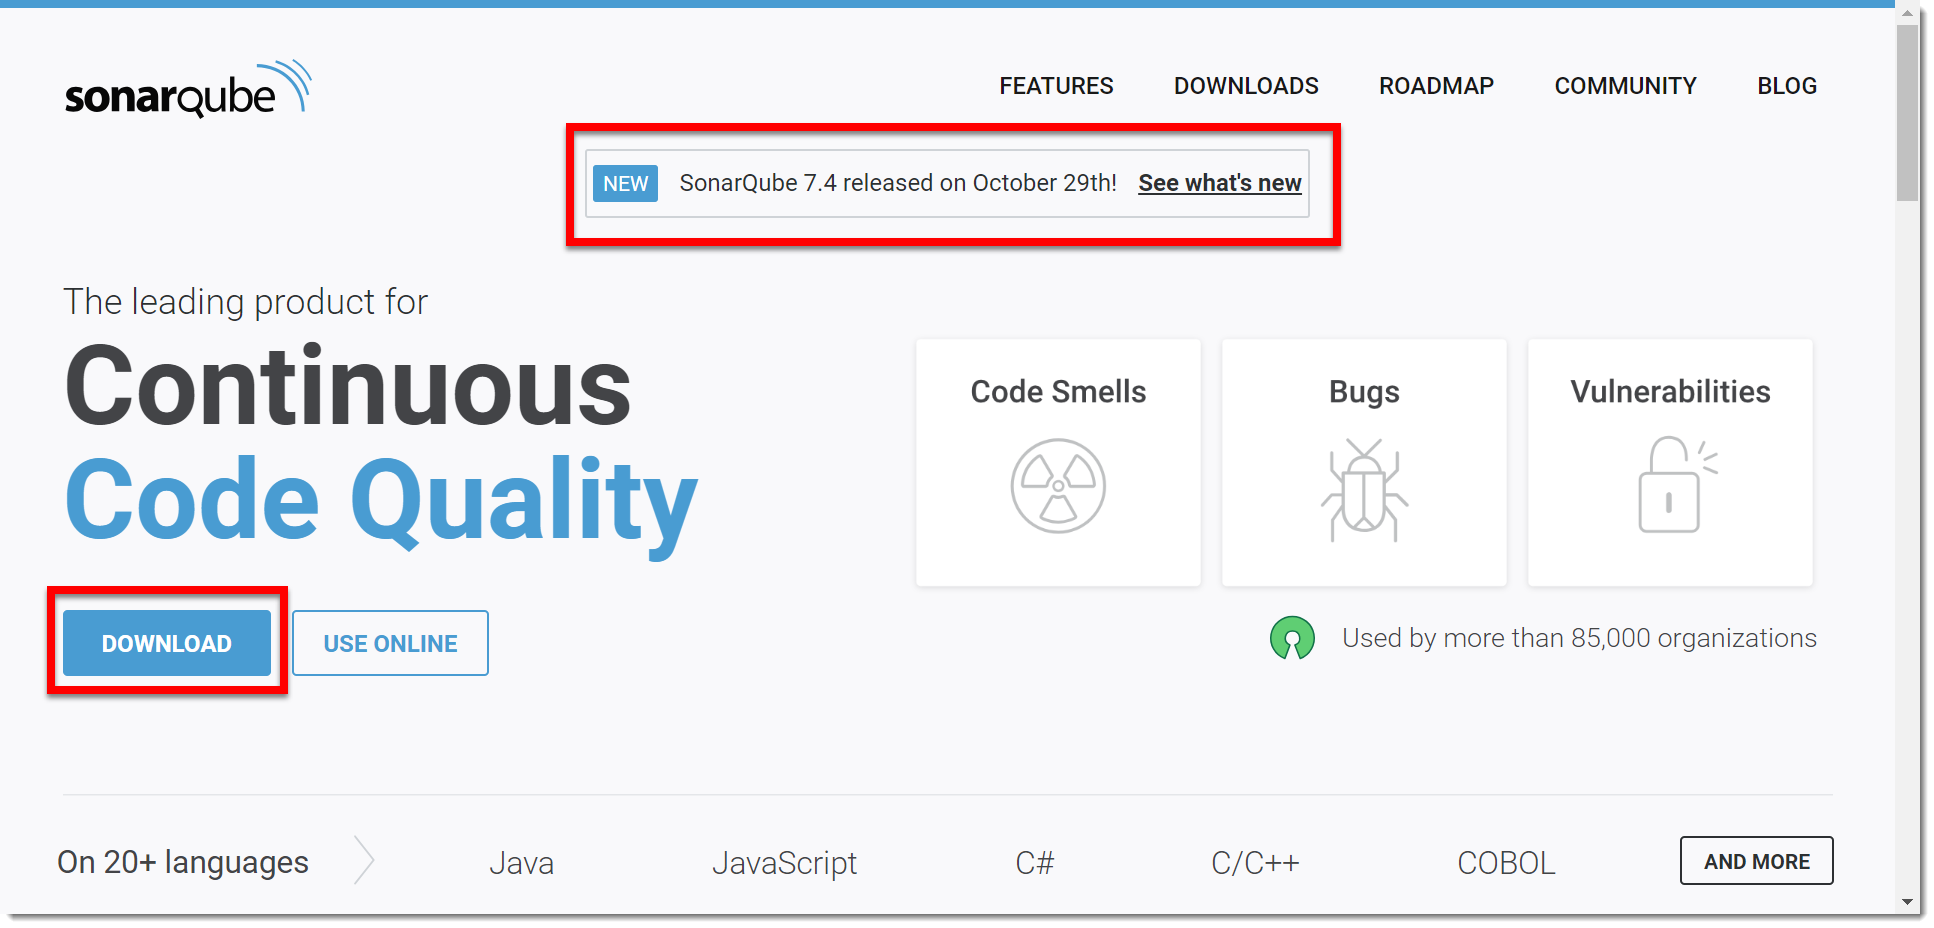
The first thing to do is to go to the official site SonarQube.
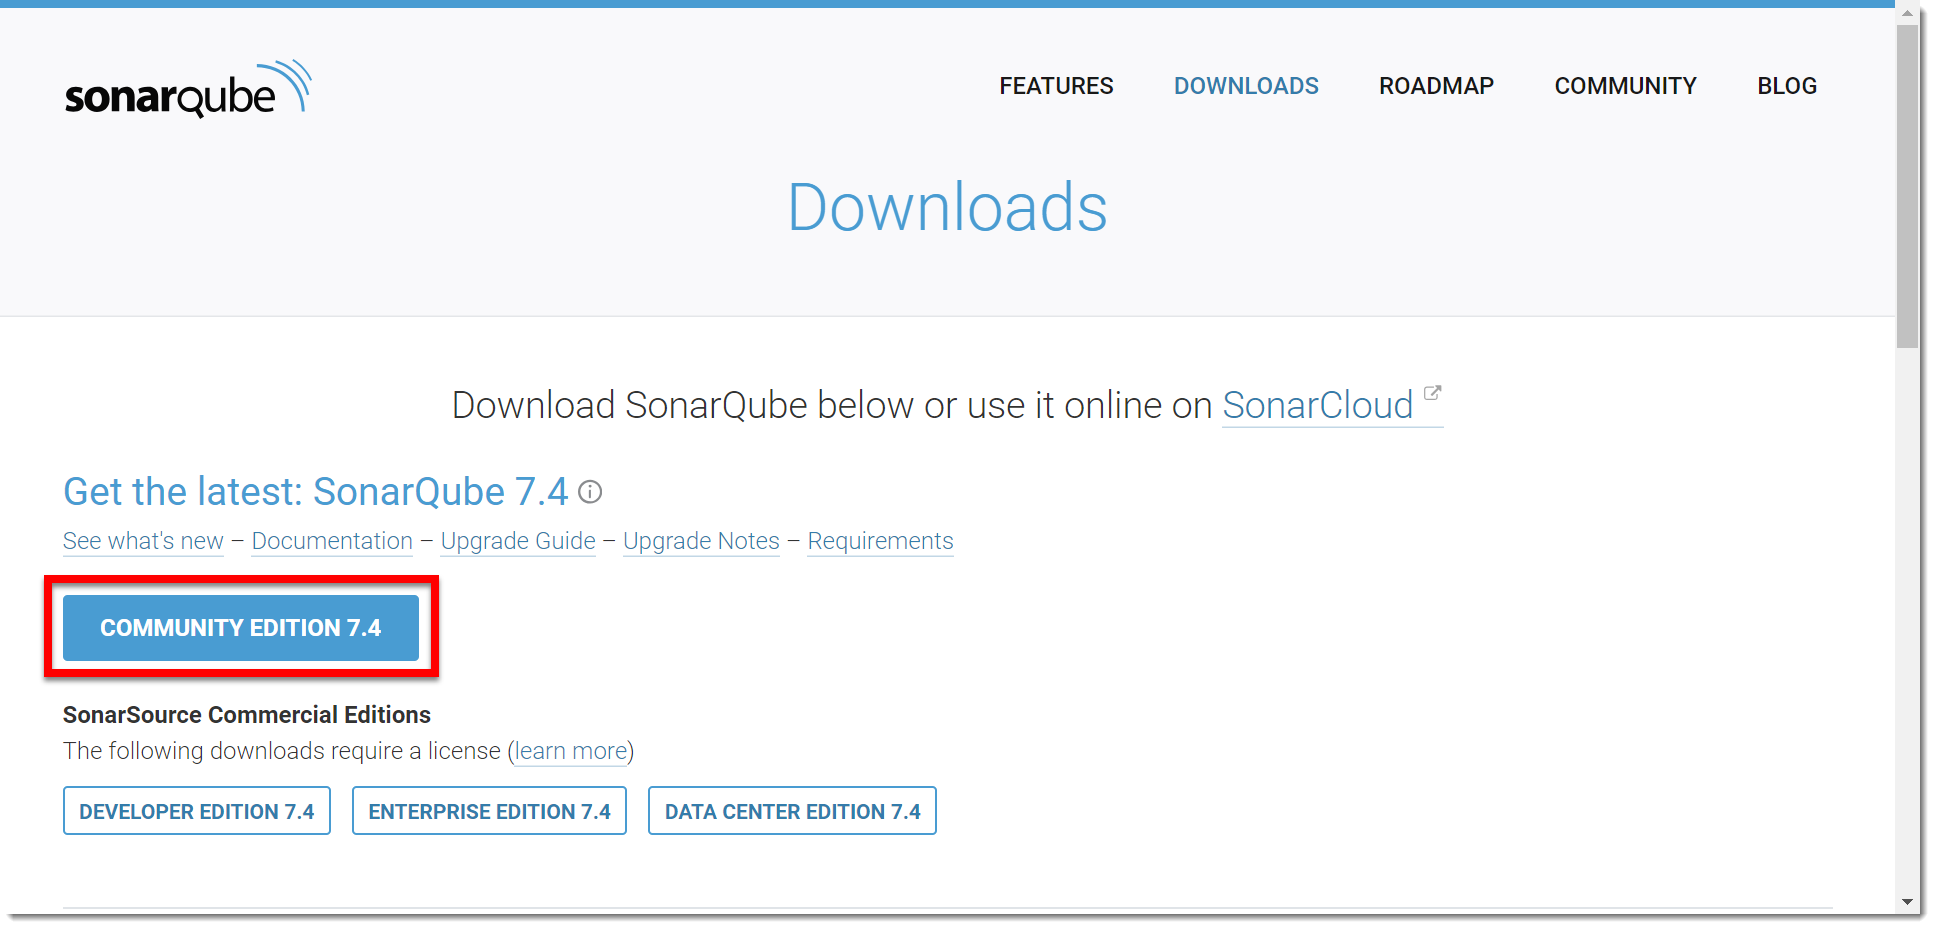
Download the latest release for the community version.
|
Sometimes you may need to download another archived version. So to do so, you can go to the following link and there you can download an archived version. |
Here we are going to use the version 7.4 at the time of writing.
This will lead you to version choice selection.
After the download is finished, you will have a ZIP file, unarchive it to any place you like and remember that location as it will be the place where we will execute the next steps.
Before we launch the Sonarqube server we must consider changing some default values may you need it. Go to the location you have unarchived the software and go to the conf and open in your editor the file sonar.properties, locate the following properties (they are marked as comment indicating that they are defaults)
sonar.embeddedDatabase.port=9092 (1)
sonar.web.port=9000 (2)
sonar.search.port=9001 (3)| 1 | Port used for embedded H2 (used for demostration purposes, configure a real database such as MySQL, consult SonarQube documentation). The 9092 is the default value, here it is changed to 4502. |
| 2 | Port used as the gateway to user to connect to SonarQube server. The 9000 is the default value, here it is changed to 4500. |
| 3 | Port for Search Engine used internally by SonarQube. The 9001 is the default value, here it is changed to 4501. |
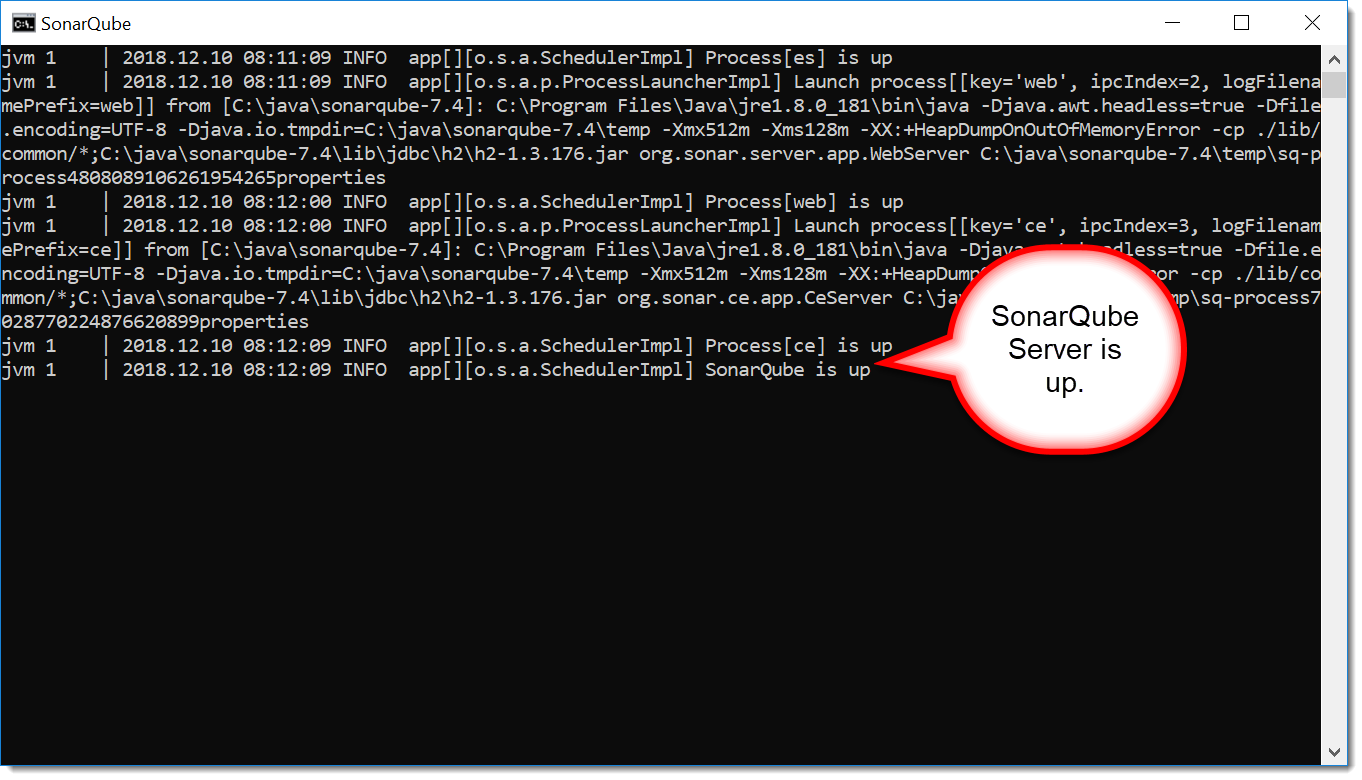
Save the file and now it is time to run the SonarQube server. Go to where you unarchived the software and locate the bin directory and select the the folder that matches your operating system, open a command line interface terminal and run the script named StartSonar.bat (in Windows), or sonar.sh in Unix-like operationg systems.
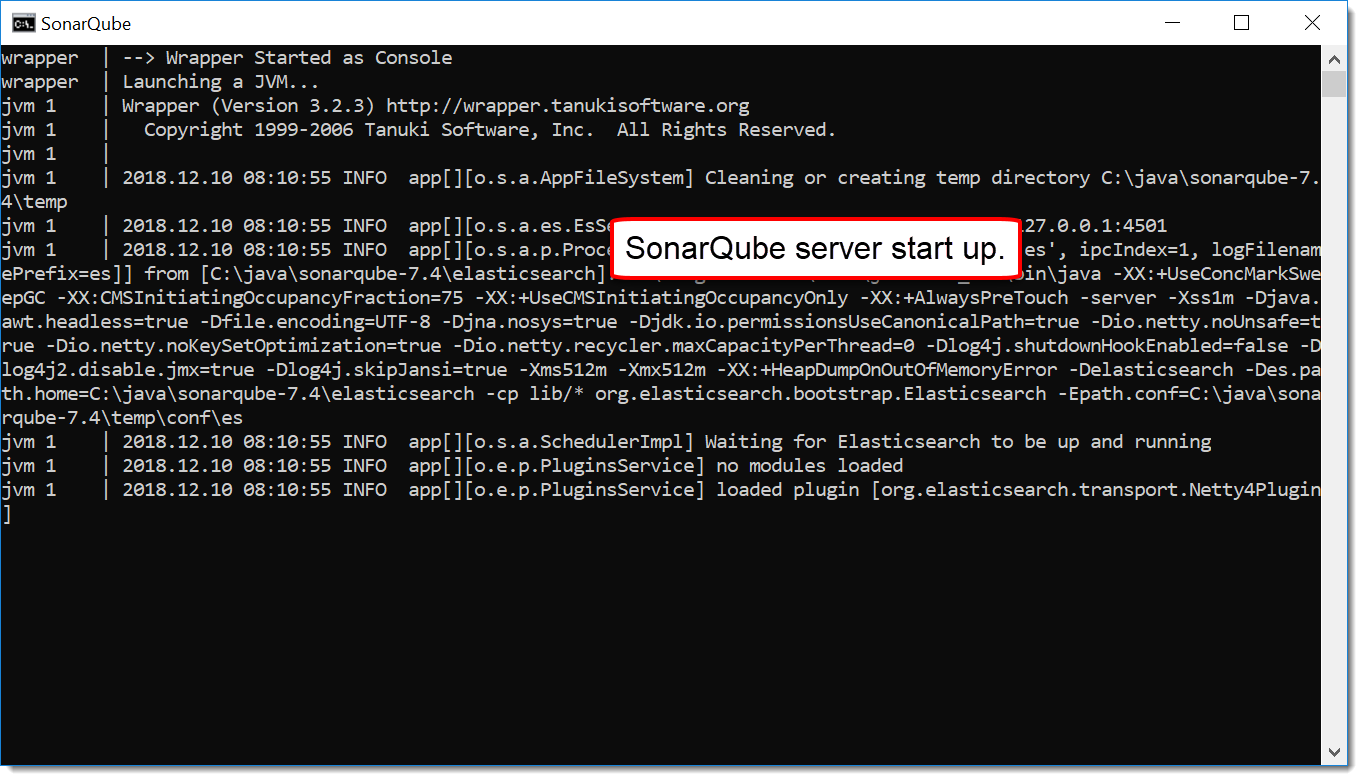
Wait until the console output indicates that server is up.
Open an internet browser to access SonarQube web interface, and locate its Login button, click on it and use the Admin/Admin credentials. Remember to use http://localhost:4500 to access this web interface.
|
The default credentials are for the full administrator of the system, it is advised you change it as soon as possible. |
When setting up the server for the very first time and in Admin mode, the system allows you to use a two minute tutorial to make you up and runnig with the server (using the default Quality Profiles and Quality Gate).
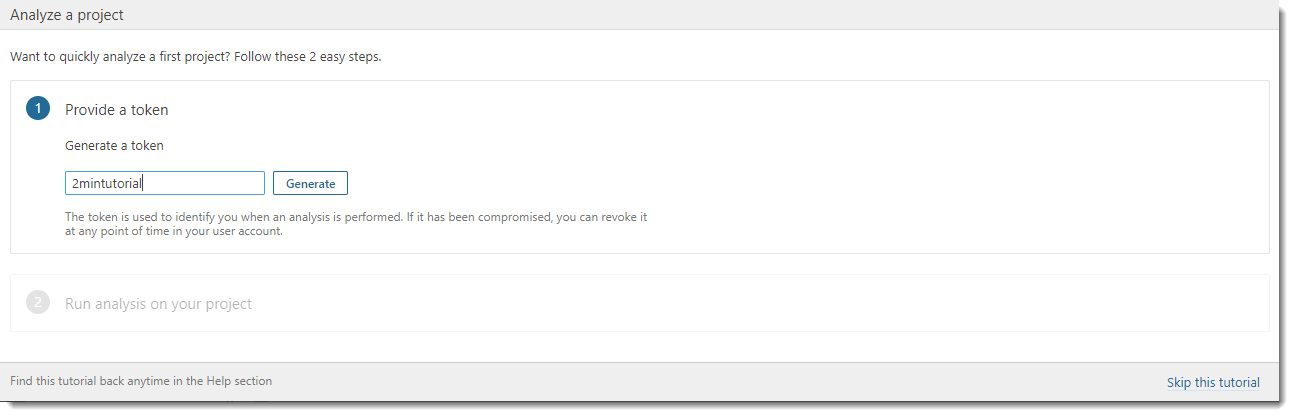
If you consider that you need to skip the tutorial, use the link at the bottom. Set the name for the token. As shown (or anything you like) and click the Generate button.
|
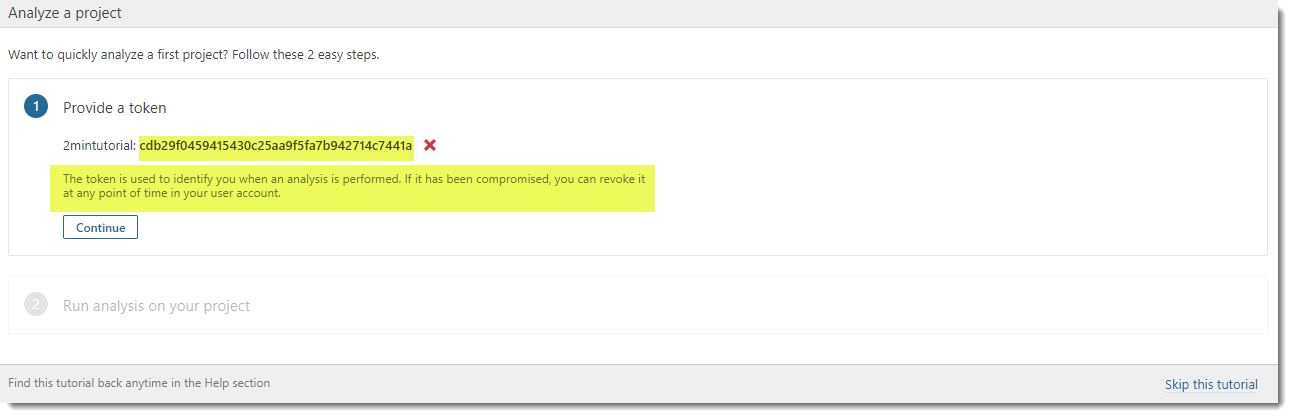
Write down that token name and the generated token somewhere as it will not be shown to you again as the note in the screen shows. You can grant or revoke it later in the administrative pages. We will use this token later when analyzing a Maven Java Project. |
|
Referenced here for documentation purposes. Token: cdb29f0459415430c25aa9f5fa7b942714c7441a |
SonarQube Intellij
V6.7.x Problem with component_list.pb https://community.sonarsource.com/t/sonalint-invalid-binding-issue-because-of-component-list-pb/64828