IntelliJ Smart Tomcat
The SmartTomcat will auto load the Webapp classes and libs from project and module, you needn’t copy the classes and libs to the WEB-INF/classes and WEB-INF/lib.
The Smart Tomcat plugin will auto config the classpath for tomcat server. The Smart Tomcat support Tomcat 6+.
So here we are going to explain how to install and configure this IntelliJ plugin.
Installation
The first thing you need to do is open the IntelliJ IDE, for this guide the version used is 2021.2.3 or later.
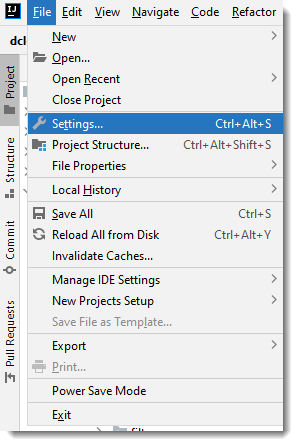
To open the IntelliJ Settings dialog, do the following.
-
In Windows, navigate to File → Settings or press CTRL+ALT+S.
-
In MacOSX, navigate to IntelliJ IDEA → Preferences or press _CMD+,.
|
Most of the screenshot captures are taken using the Windows OS. |
Next locate in the options the Plugins choice. Use the search box to locate it quickly as shown next.
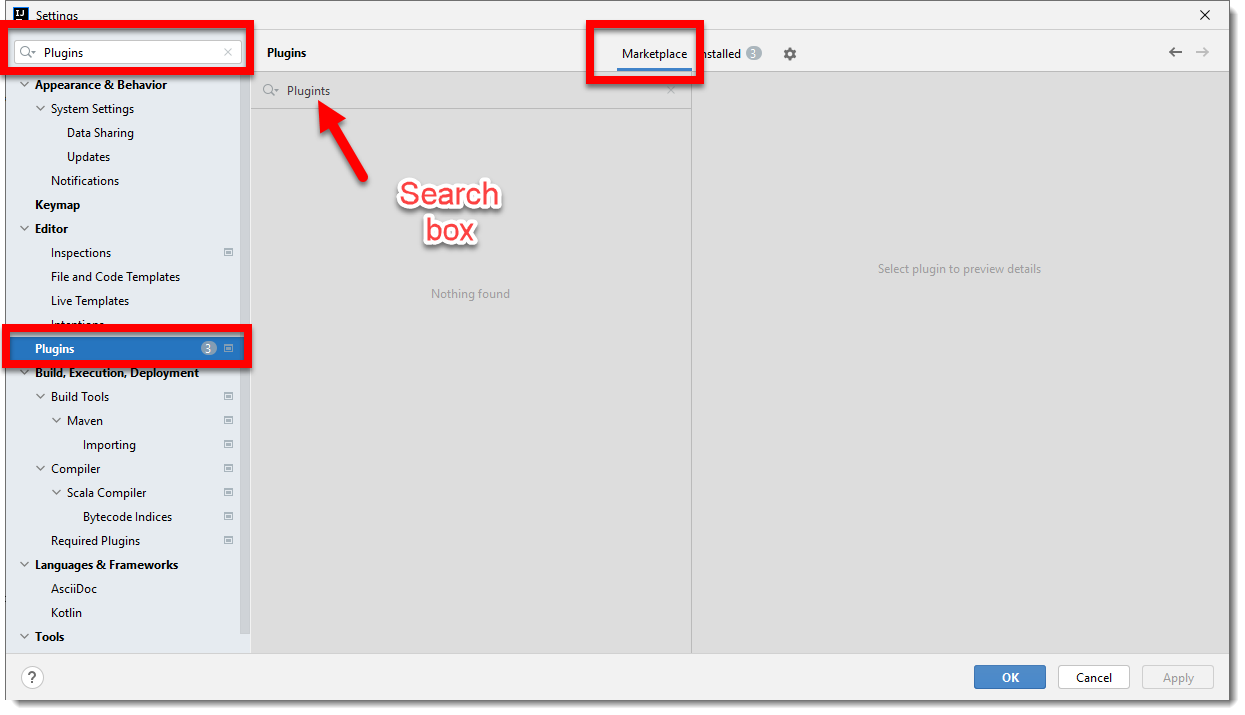
Play special attention that the dialog presents two choices for checking if the desired Plugin is installed or not, notice in the screenshot that it has two tabs, one named Marketplace and the other Installed. If the Plugin is not yet installed it means you need to look for it in the Marketplace tab, typing in the search box the name of the Plugin you need, in this case, Smart Tomcat.
|
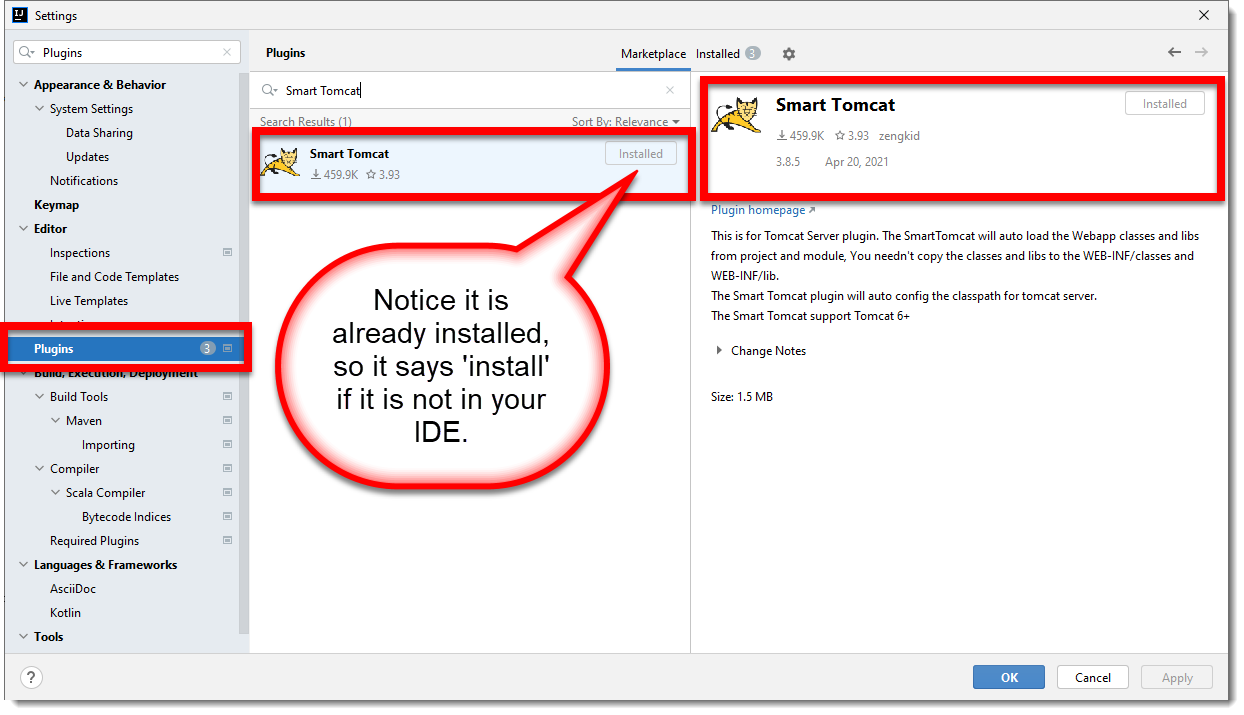
As indicated in the screenshot, the Smart Tomcat is already installed, but if you happen not to have it already installed in your InteliJ, it would say _Install, which is the action you should take now. |
After the plugin is correctly installed then it should appear in the other tab mentioned before.
Configuration
Now that we have the plugin properly configured, let’s add a new Tomcat configuration.
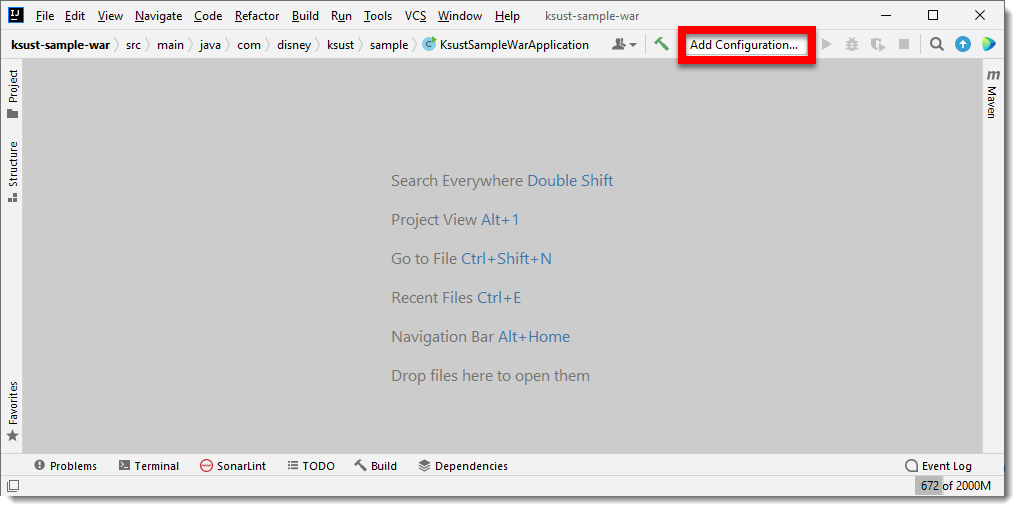
In your IntelliJ locate the Add Configuration… option shown next.
|
If the text is not there it means that you already set a configuration to run, so clicking in the same place presents you with other choices. |
And it shows the following dialog.
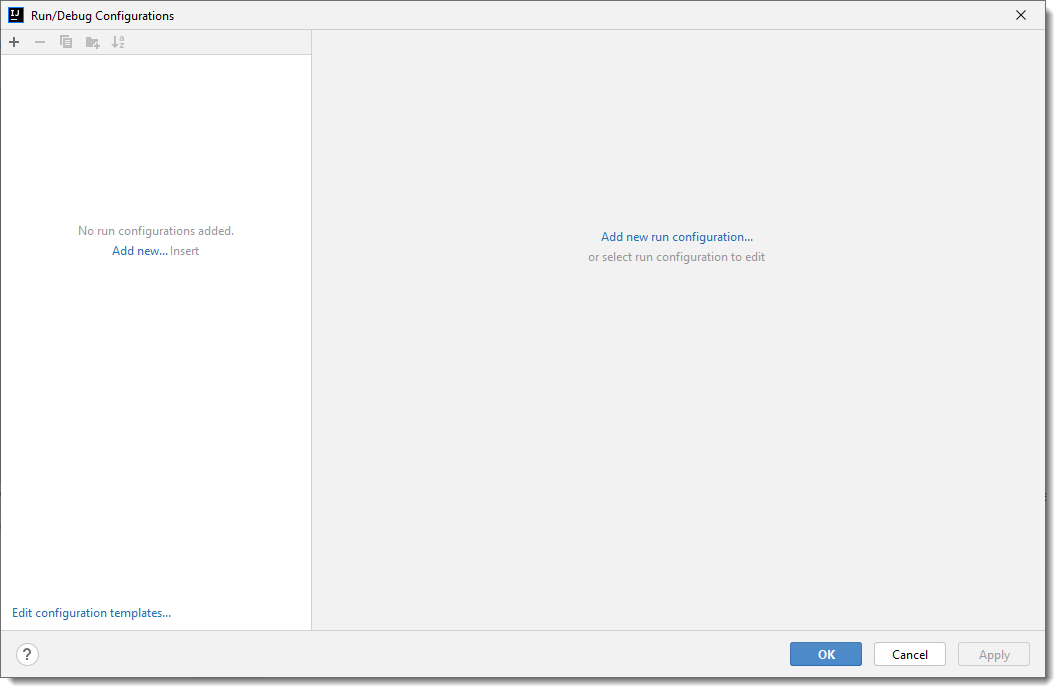
To create a new configuration just click in the plus icon to the left of the dialog.

It will present to you with a selection box.
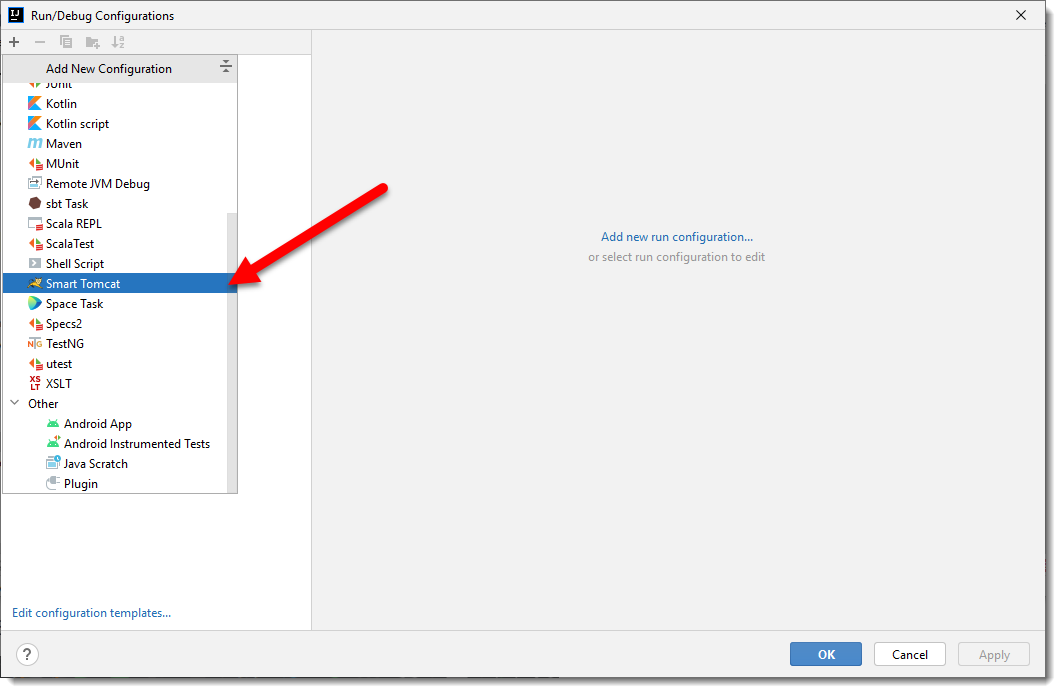
|
Scroll down to locate the Smart Tomcat configuration to add. |
As you may have guessed, Smart Tomcat requires to know the location of your Tomcat Server so he can proceed to put the artifacts therein.
Notice that here we don’t have one defined, so it is now time to declare one as shown next, click on the Configuration button to define one.

This opens a dialog to define the Tomcat Server.

As shown in the previous imaga, there are no servers defined, so click the indicated button, where it will ask you the location in your file system where you have installed/configured your Tomcat Server.
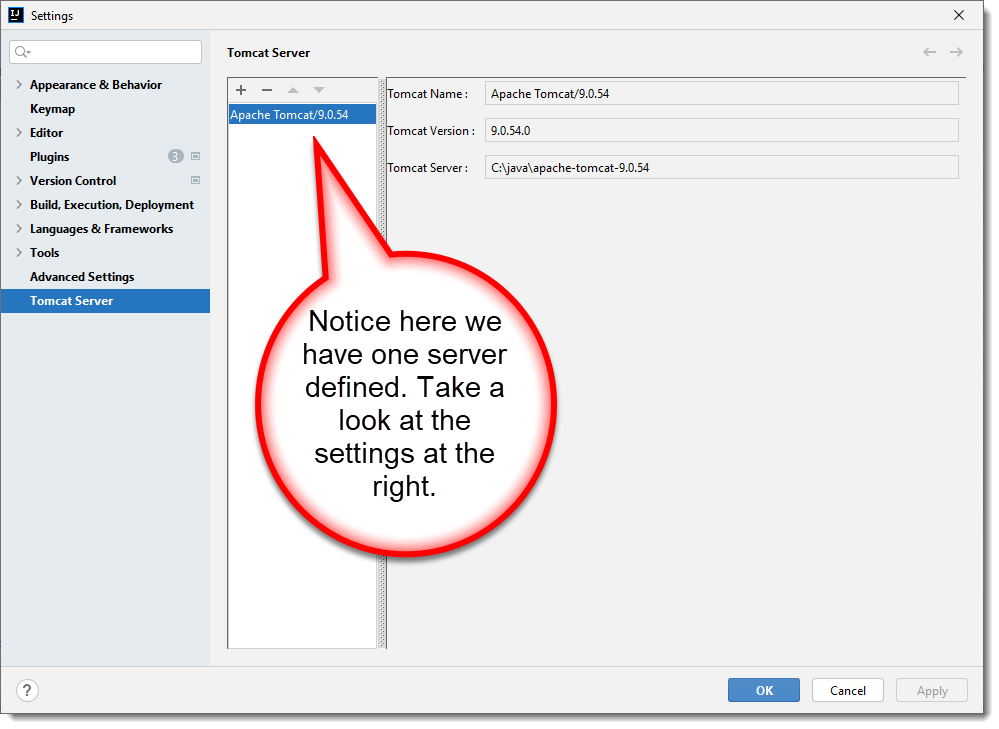
Click on the Apply and later the OK button to accept this setting.
It takes you back to previous dialog, expand the drop down box for the Tomcat Server
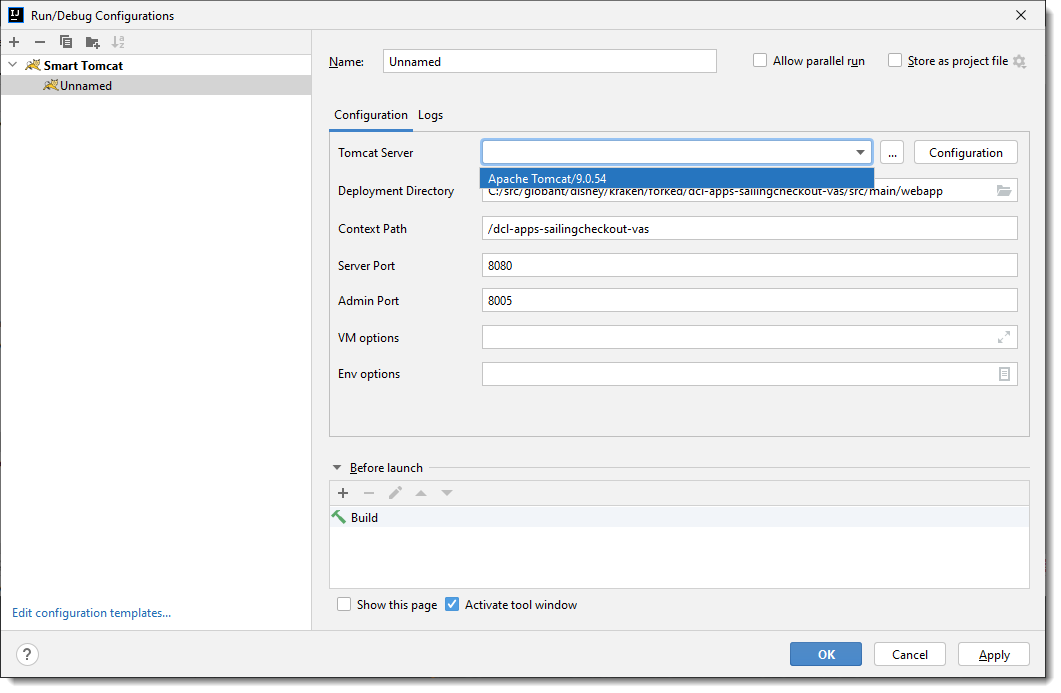
What is left is to adjust the settings according to our needs.
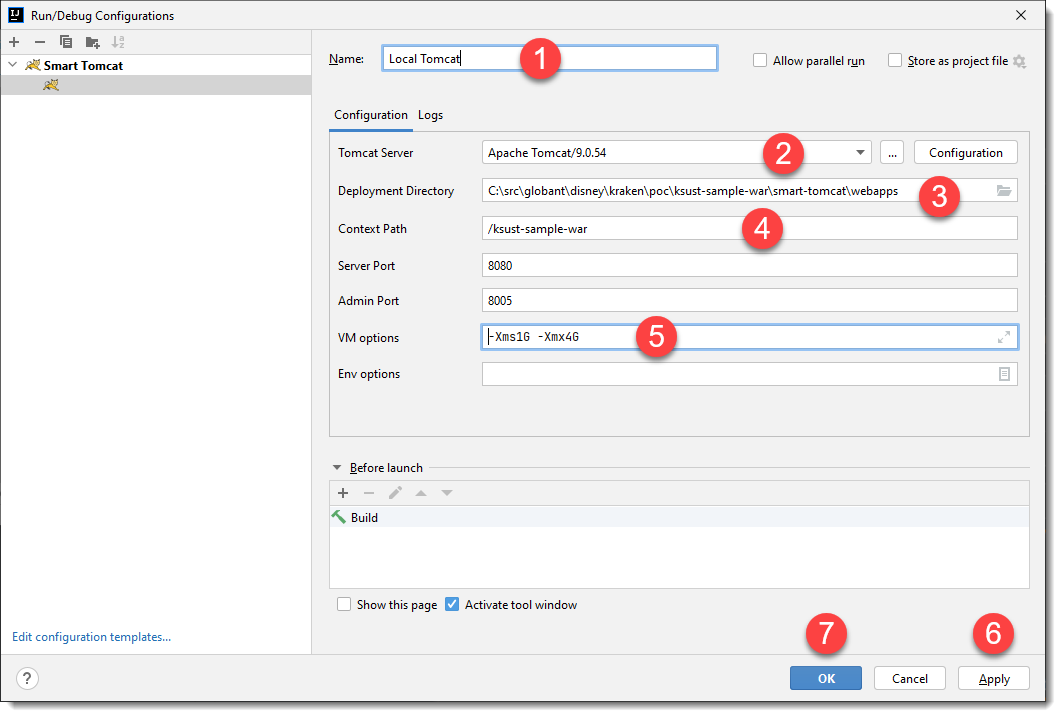
Where:
-
Indicates the name of the configuration to run/debug.
-
Choose the appropriate Tomcat server.
-
A working directory for Smart Tomcat, notice that this folder should not be included in the Git repository, that is, it must be excluded.
-
Sets the context path for the application, normaly it is the IntelliJ module.
-
Indicates the memory assigned to the Tomcat process.
-
Click the Apply button to accept the changes.
-
Click the OK button to accept the changes and close the dialog.
|
This is a sample configuration, it may change given your requirements. |