Configure External Diff Tool
When you have to solve conflicts in git. You normally would see the conflict marked in the same file but in a cumbersome to edit it by hand.
So it is better to have a graphical user interface that helps in identifying the changes and do it graphically. The purpose of this document is to setup such a tool to use inside the git command tool in the terminal.
As a reference of merge conflicts situations, take a look into Understanding merge conflicts.
Installing Visual Merge Tool
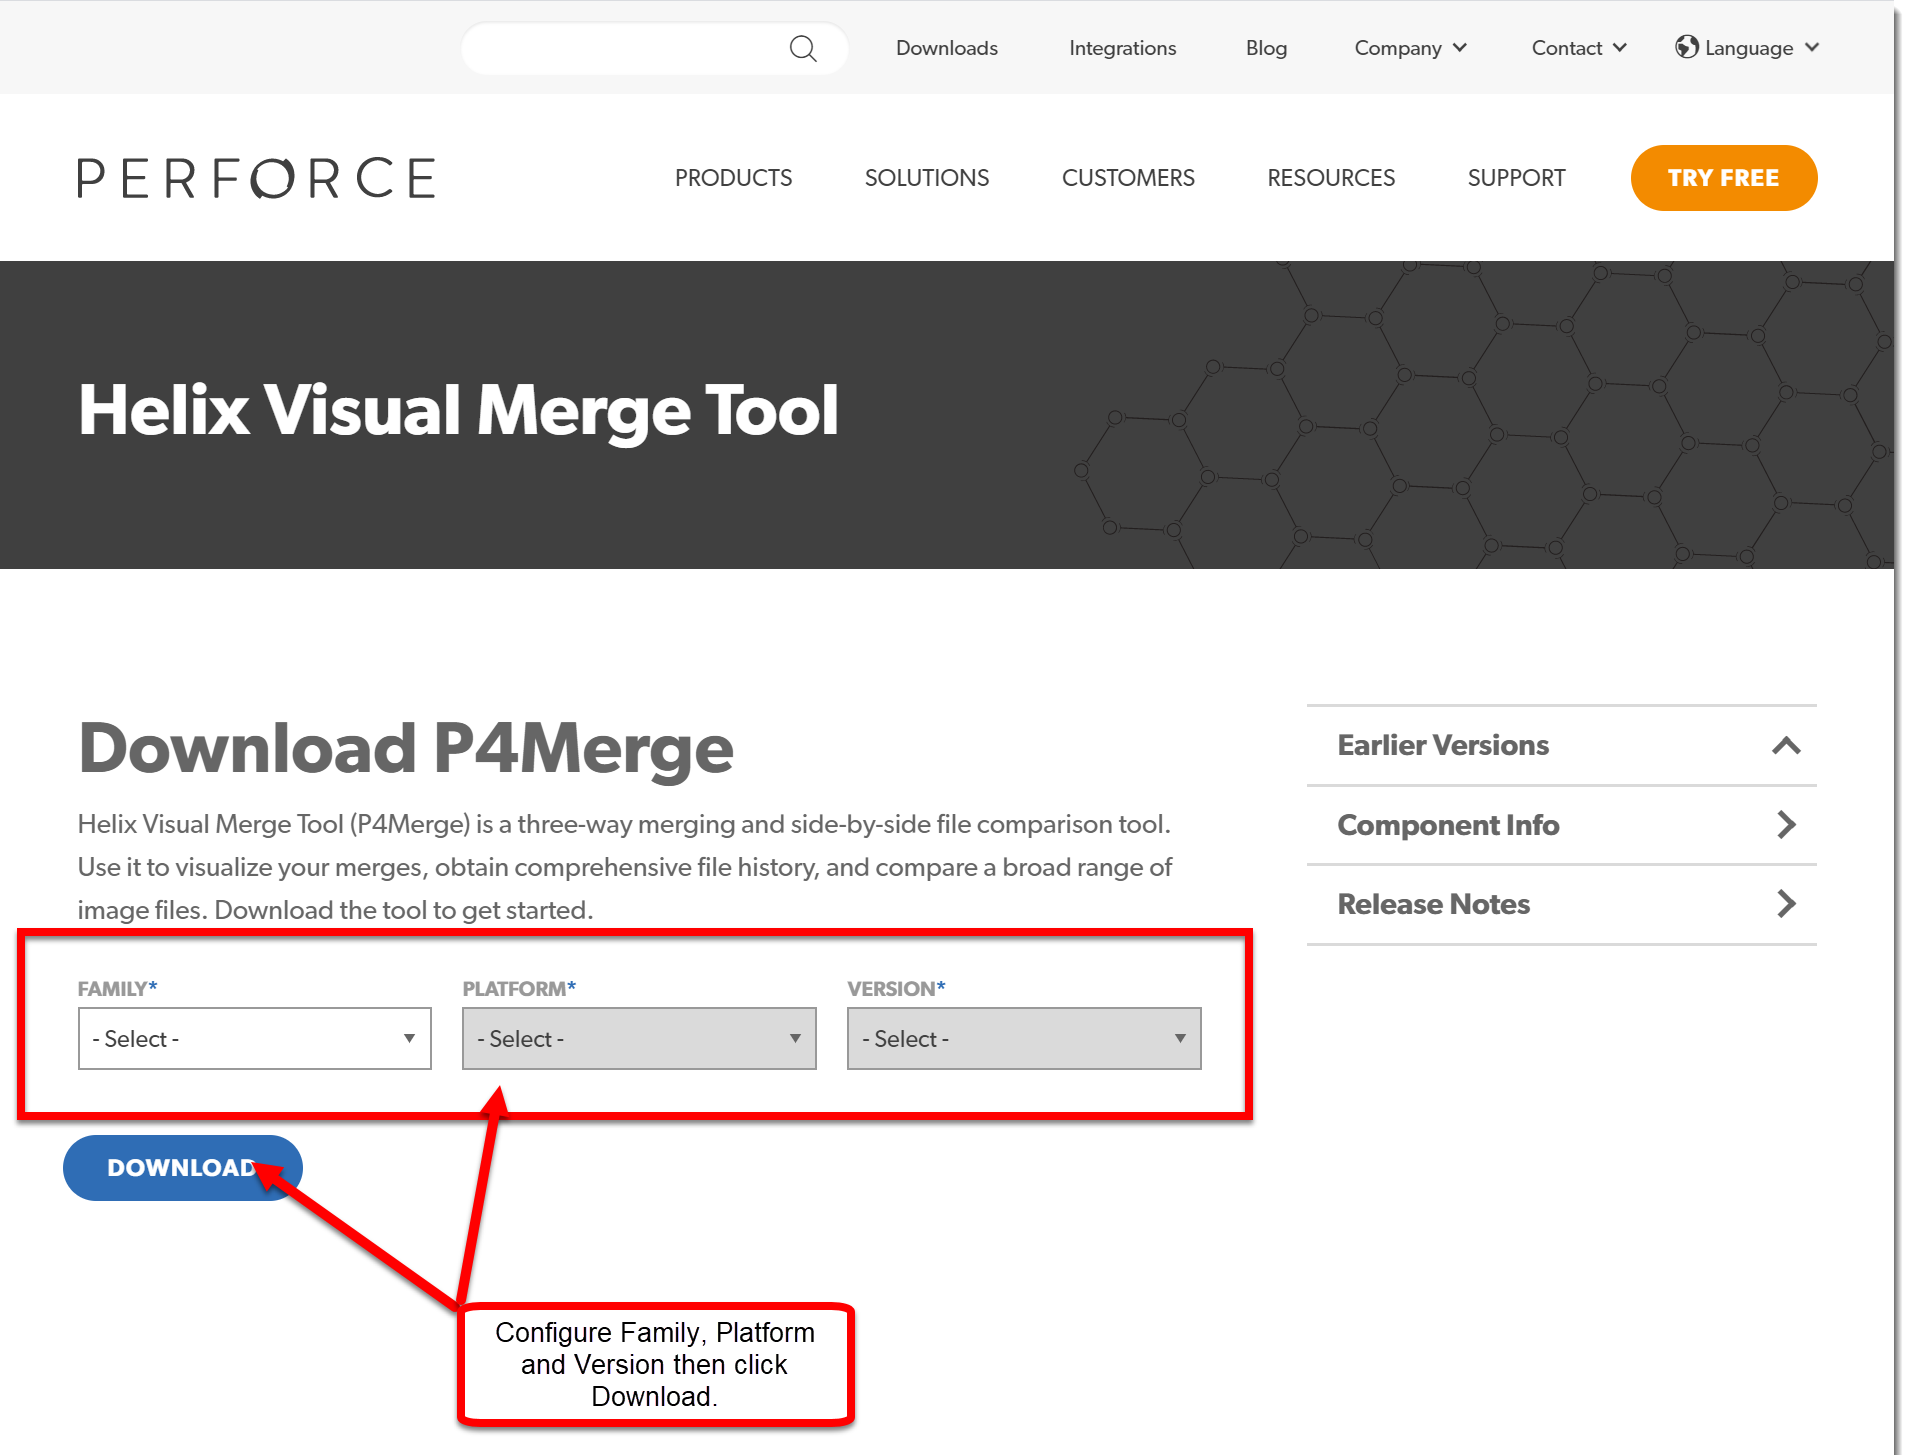
Go to the following link to download Helix Visual Merge Tool.
You will see a link like the following.
Once you have it downloaded, execute the installer program following your Operating System conventions, for the sake of this guide, it will use the 'Microsoft Windows' Operating System.
Click 'Next' button.

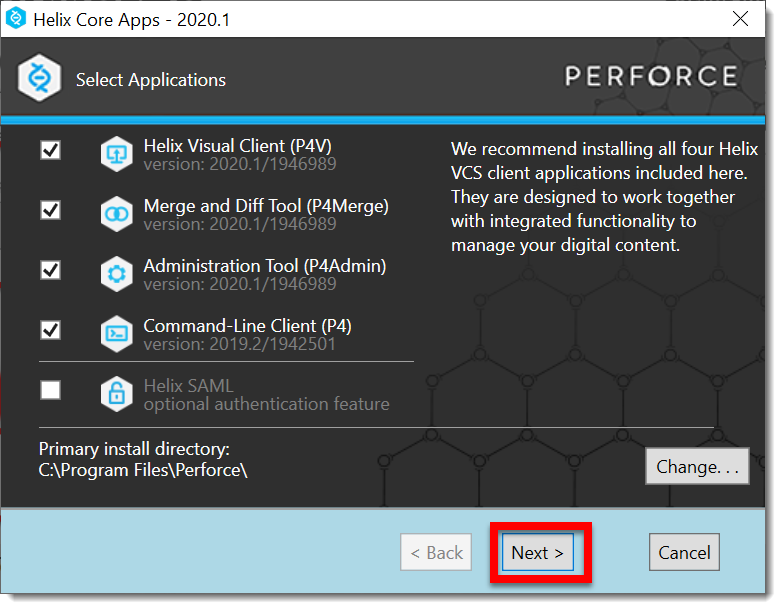
Select fields as shown in the last picture and then click 'Next' button.
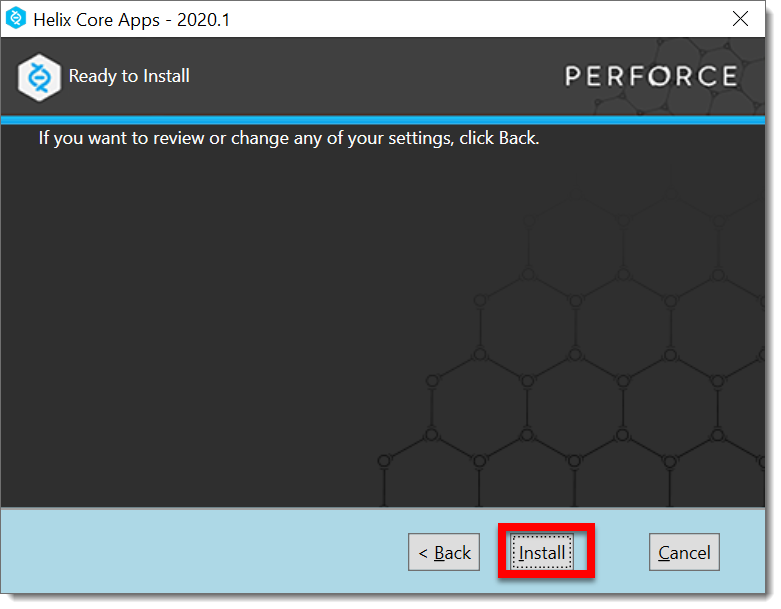
Click 'Install' button.
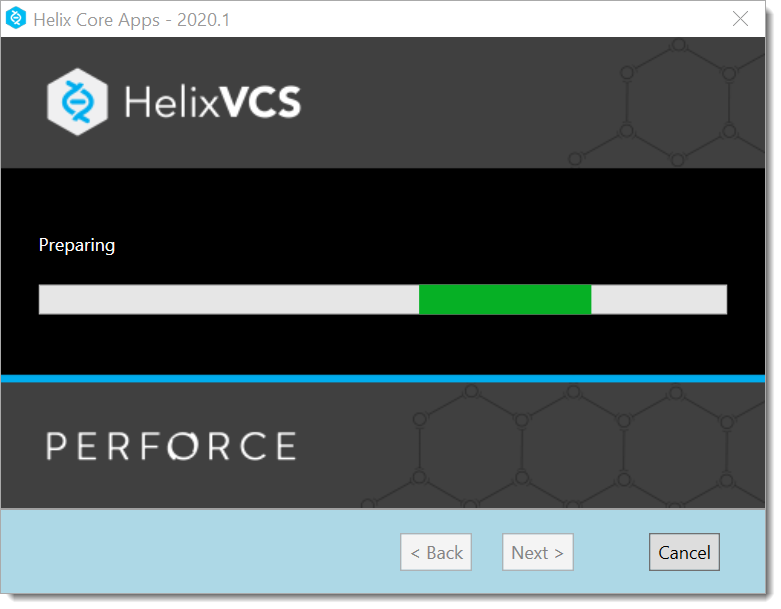
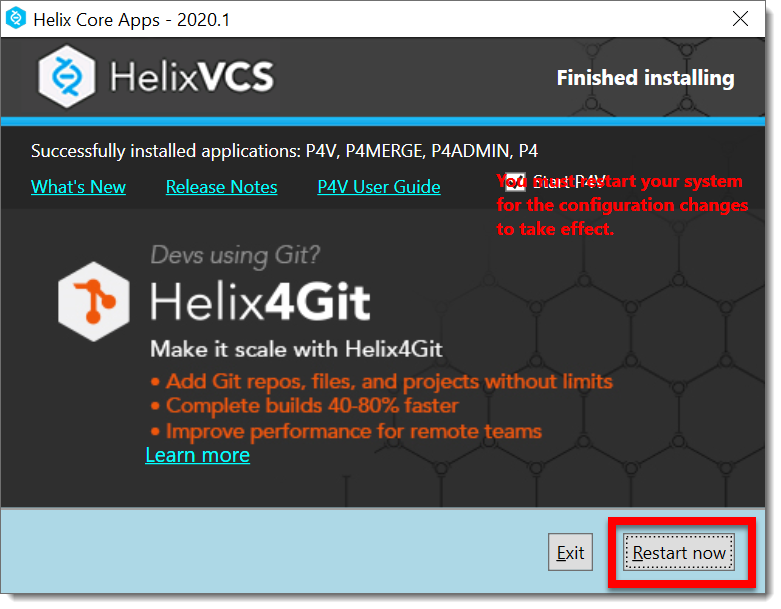
At this point it will make the setup process, it will take some minutes to complete, after that you will see the following.
|
Notice that the installation needs to restart your computer for the configurations to take effect. |
Click Restart now to complete the setup process, after you restart you will see the following.

Configuring Git Merge Tool
In this section we will indicate the steps to make the 'git client' to use the external tool in order to resolve merge conflicts in a confortable way.
First step is to indicate git tool which will be the external diff merge tool. Open a git bash terminal and type the following.
$ git config --global merge.tool p4mergeThis will add an entry key in the global git bash configuration settings file.
Now it is time to indicate git bash what is the external path to use to associate to the merge.tool.
$ git config mergetool.p4merge.path "C:\Program Files\Perforce\p4merge.exe"|
Notice the path is expressed in the Operating System specific syntax. |
Now that we have the merge tool git bash will use to resolve conflicts in a more visual way, it is time to see it in action.
$ git mergetool|
To have a visual cue of the Visual Merge Tool in action, I followed the tutorial steps in Understanding merge conflicts. |
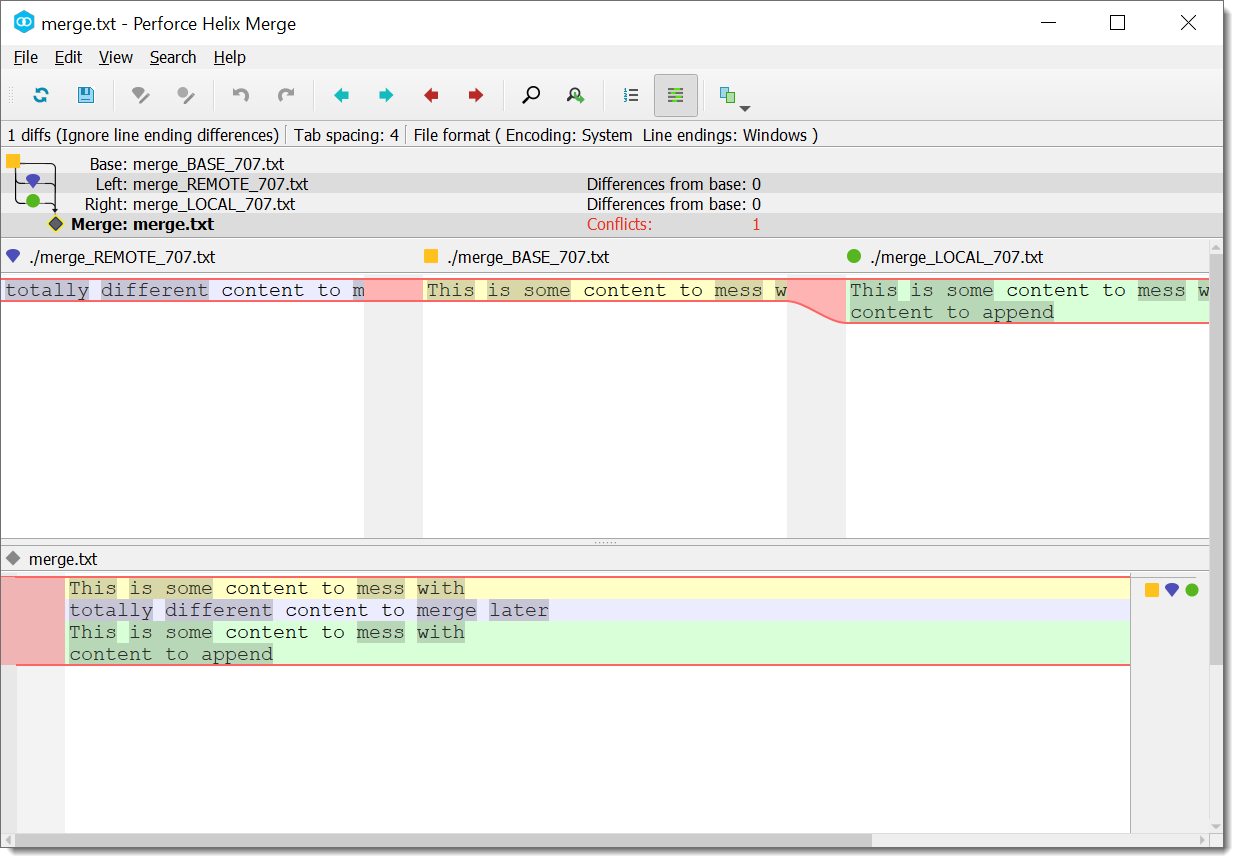
Now if you execute the command git mergetool, git will execute the external configured merge tool, by showing the following screenshot.
|
If you need more information about how to use the 'Visual Merge Tool' you can open the help menu in the program which leads to the following link P4Merge Help. Notice that it is best to open the link from within the program as it may change the version. |
|
As per the tutorial, the conflict is in the file 'merge.txt' file, to which git creates the following files underneath to pass them to the 'Visual Merge Tool' in order to accomplish its task.
|
After you have resolved the conflict, you must save the changes in the tool.
|
After you have resolved the conflicts and saved the changes it will tell |
If you have more than one file in conflict, it will open the 'Visual Merge Tool' for each of the conflict files and you repeat the steps described to solve the conflicts, after all of the conflicts are resolved you simply add a commit to finish the merge process to indicate the conflicts were resolved.